
Standard Operating Procedure
Warehouse Operations Inventory Processing
Warehouse Operations · Applies to all Nellis Auction Locations
| Document ID | SOP_Operations_InventoryProcessing_05.11.2026_V1 |
| Version | 1.0 |
| Effective Date | 04/27/2026 |
| Process Owner | NLV Facility Leadership team |
| Department | Warehouse Operations / Inventory Processing |
| Facility | Applies to all Nellis Auction Locations |
Purpose
The purpose of the Inventory Processing Standard Operating Procedure is to clearly outline the required steps to process items safely, accurately, and efficiently to achieve desired business outcomes. This SOP serves as the foundational reference for all inventory processors at Nellis Auction.
Scope & Audience
Scope
This SOP applies to all inventory processing activities at Nellis Auction, including receiving, grading, photographing, and staging inventory for auction listing. It covers standard processing as well as exception handling for unidentified items.
Audience
Warehouse Team Members (Inventory Processors), Area Managers, Operations Managers, and Certified Trainers.
Roles & Responsibilities
| Role | Responsibility | Description |
|---|---|---|
| Team Member / Inventory Processor | Processing | Processes units with speed and quality. Responsible for accurate data entry, proper grading, photo capture, and correct staging. This is the first entry point of inventory into the auction system. |
| Certified Trainer | New Hire & Continuous Training | Trains all new team members on every aspect of inventory processing including equipment, Cargo navigation, grading standards, photo requirements, program-specific exceptions, and this SOP. Also delivers ongoing refresher training. |
| Area Manager | Load ID Validation | Every trailer must be received with a valid Load ID before processing begins. Area Managers ensure processors have the correct Load ID or Pallet ID for each trailer load. |
Definitions & Key Terms
| Term | Definition |
|---|---|
| Processing | Processing — The act of receiving, identifying, grading, photographing, and staging inventory units for auction listing. Team Members performing Processing are responsible for accurate data entry, proper grading, photo capture, and correct staging. Processing is the first entry point of inventory into the auction system. |
| Inventory Number | The internal barcode that captures the information for the item being processed. Primary identifier for each unit in Cargo. |
| Load ID | A unique number used to track each program received at a facility. Every trailer must have a valid Load ID before processing begins. |
| Program | A specific retail or wholesale supplier contract under which Nellis Auction receives inventory. Each program corresponds to a particular source (e.g., Amazon, Walmart). |
| Pallet ID | A unique identifier assigned to individual pallets within a load. Used when processing is tracked at the pallet level. |
| Adult Item 18+ | Sensitive items not suitable for general audiences (e.g., sexually explicit items, tobacco). Toggling this flag separates these items in the auction so they are not mixed with general inventory. |
| Multiple Item | A toggle used to process multiple identical items at once. Sequences of up to ten items that all receive the same information upon a single submission. |
| Trash Item | A button that marks an item as unsellable, prompts the processor to log the disposal reason, and tracks trashed items per trailer load. |
| Clear Form | A button that clears the entire processing form and resets it to blank. Use with caution — all entered data will be lost. |
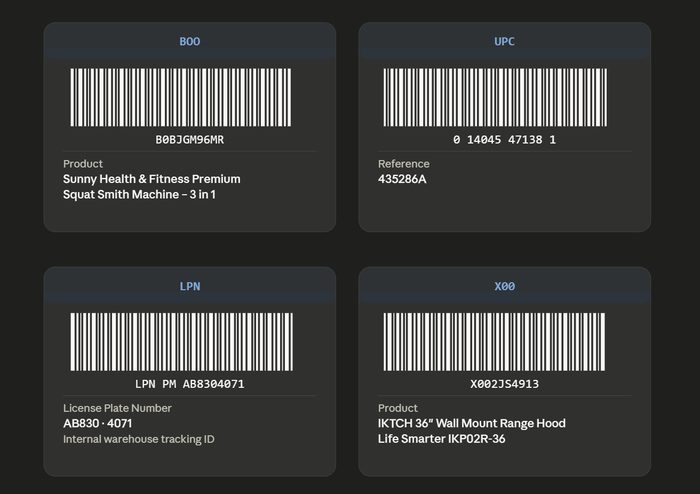
| LPN / UPC / ASIN / X00 / ISBN | Barcodes found on most received items containing product listing information. If a scan returns no match in Cargo, follow the LPN Exception Workflow. |
| Item Category | One of the available grading selections in Cargo that best describes the product category for an item being processed. Must be selected for every item. |
| Grading Category | The physical evaluation section of the processing form. Includes: Condition (New or Used), Damage, Missing Parts, Functional, Packaging, Assembly Required, and Item Size. |
| Partial Set | A Missing Parts grading option for confirmed incomplete multi-box items (e.g., Box 1 of 2). Distinct from Yes, No, or Unknown. |
| Warning Triangle (!) | A reporting tool in the Identify section of Cargo to flag LPN mismatch inaccuracies. Currently under development. |
| Google Lens | An AI-powered image search tool within Google used to identify items when no barcode scan or manual search returns a result. |
| ITEM TIMER | A countdown timer displayed on the processing form that tracks how long a processor spends on each item. The timer is program-specific and counts down toward a set goal. When it reaches zero, it continues into negative time as a visual reference — no system action is triggered. |
Required Supplies & PPE
| Equipment / Supply | Supplier / Item Number | Photo / Reference |
|---|---|---|
| Box Cutter | Uline / H-1369 |  Always cut away from body |
| Replacement Blades | Varies by knife used |  |
| Tape Gun | Uline / H-596 | 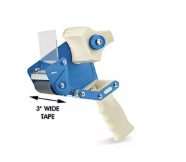 |
| Tape | Dongguan Green Packing Products Co., Ltd / PT1234 |  |
| Tape Measure | Uline / H-2064 | 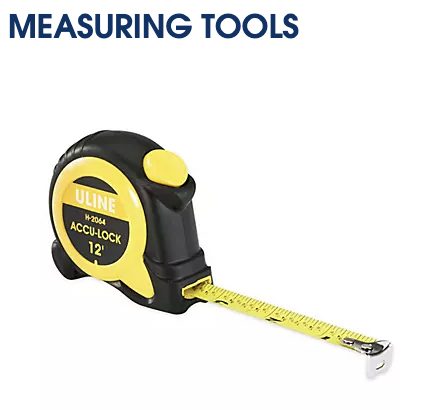 |
| Screwdriver | Amazon | 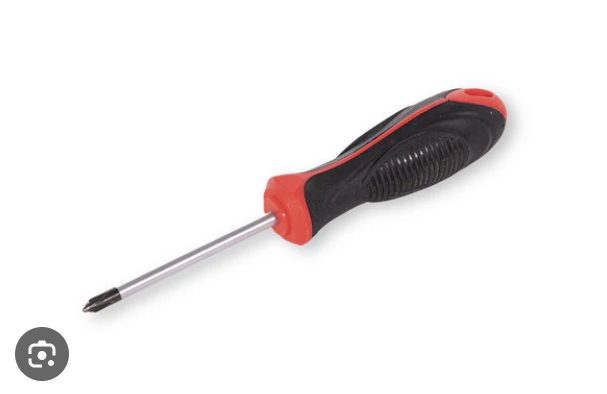 |
| Poly Bags | 24x36 / S-1357 16x24 / S-1353 10x12 / S-1340 |
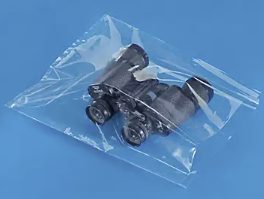 |
| Inventory Lot Number Stickers | sandy | 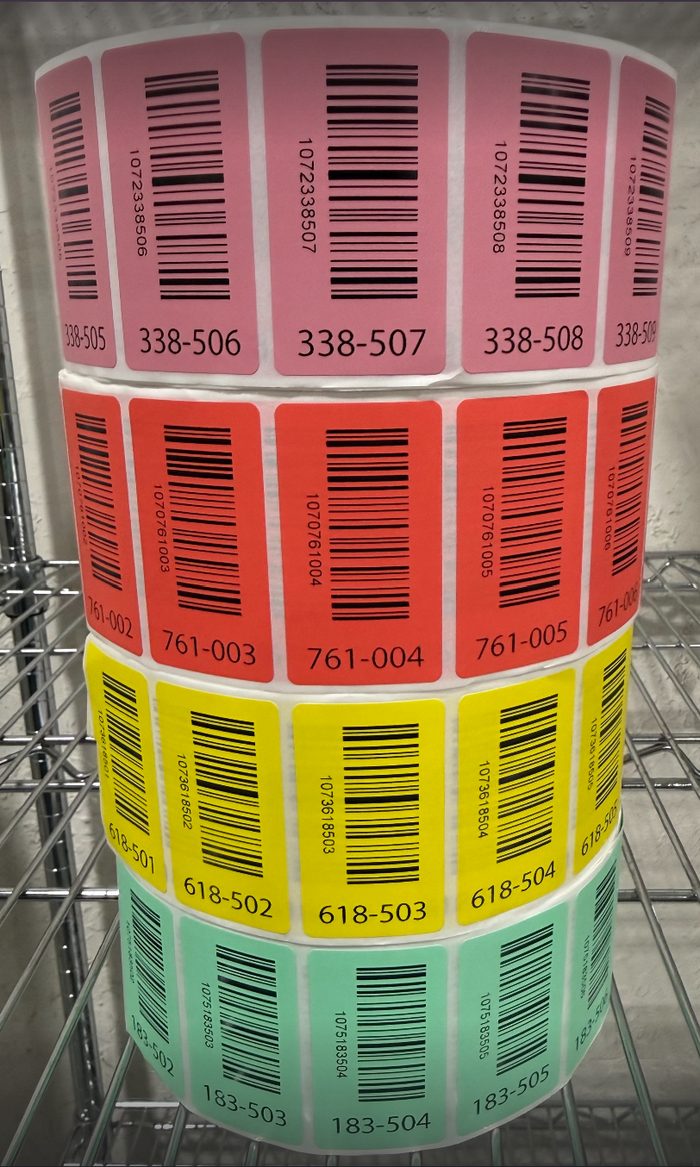 |
| iPhone | Amazon.com Amazon.com: Apple iPhone 12, 64GB, Black - Unlocked (Renewed) : Cell Phones & Accessories |
Used for photo capture in Cargo |
| Lightning Charging Cord | Amazon | 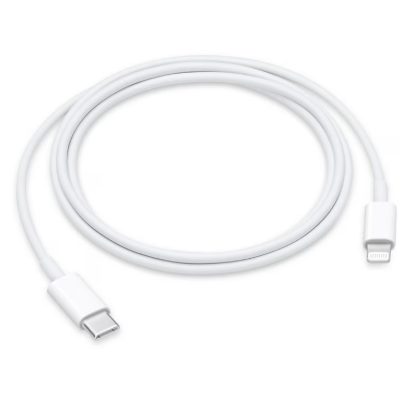 Keep charged during shift |
| Disinfectant Wipes | Amazon |  |
| Boxes - repurposed from amazon flows | No sale product - https://levi521.wixsite.com/nellis-variety-box/small-box |  |
| Supply Tote | Uline - S-14599 | 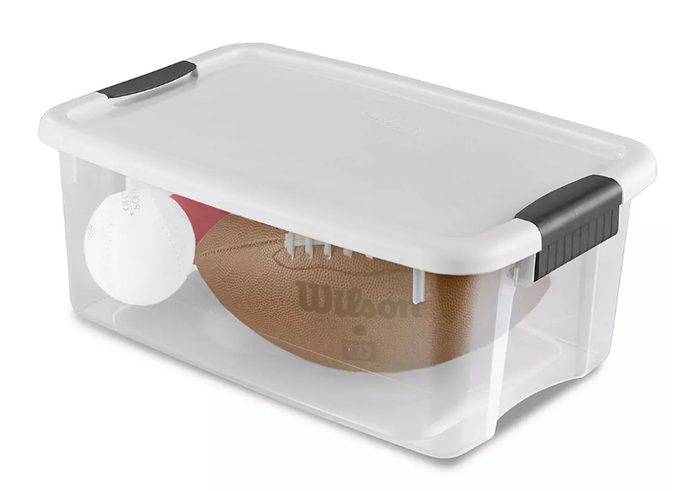 |
| Batteries — AA, AAA, C, D, 9V | amazon | 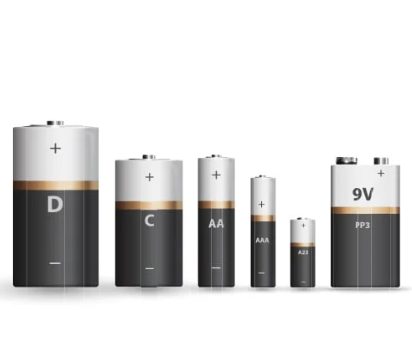 For testing electronic items |
| Scissors | amazon |  |
| Marker | Uline - S-14356 | 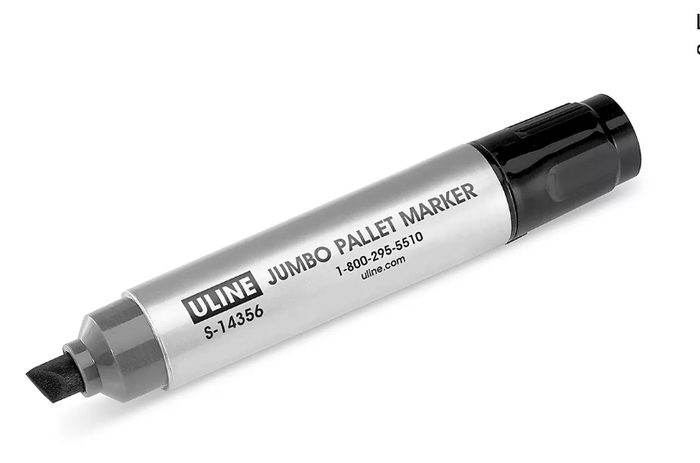 |
Procedures
Log in to Cargo and Navigate to Processing
Open the Cargo application on your iPhone and log in with your credentials. After successfully logging in, you will land on the app’s home dashboard. Locate and tap the Operations button on the home screen, and then proceed to click on the processing tool.

Select the Correct Drop-Down Mode
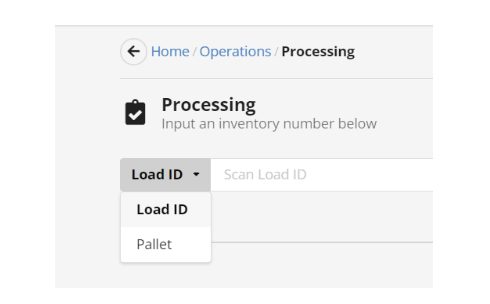
Pick the Right Mode (Drop-Down Menu)
Use the drop-down next to the scan box to choose the correct mode based on how your pallet is tracked. Picking the right option makes sure the load can be closed out correctly after everything is processed.
- Load ID – Choose this if you are working with a full trailer or entire load.
- Pallet ID – Choose this if you are scanning and tracking individual pallets.
Scan the Orange Label
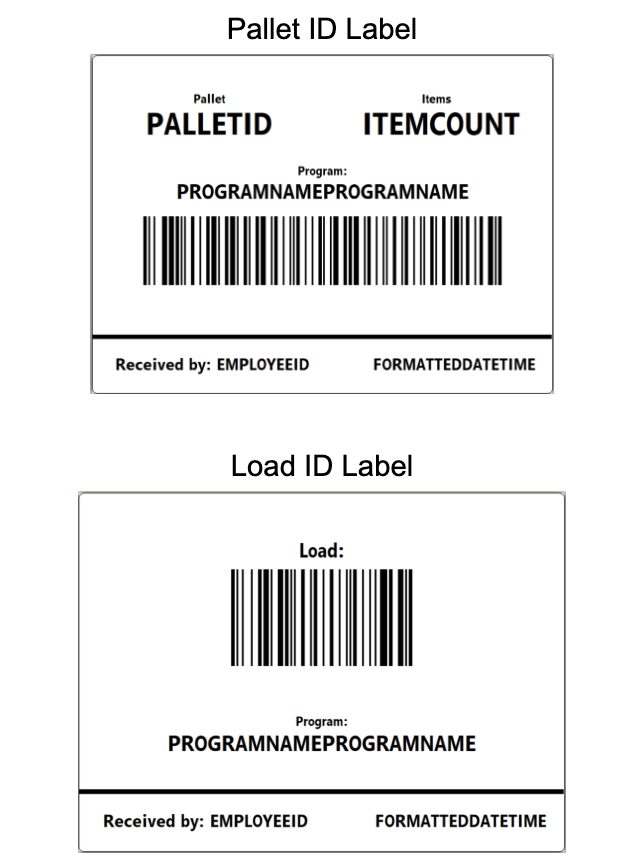
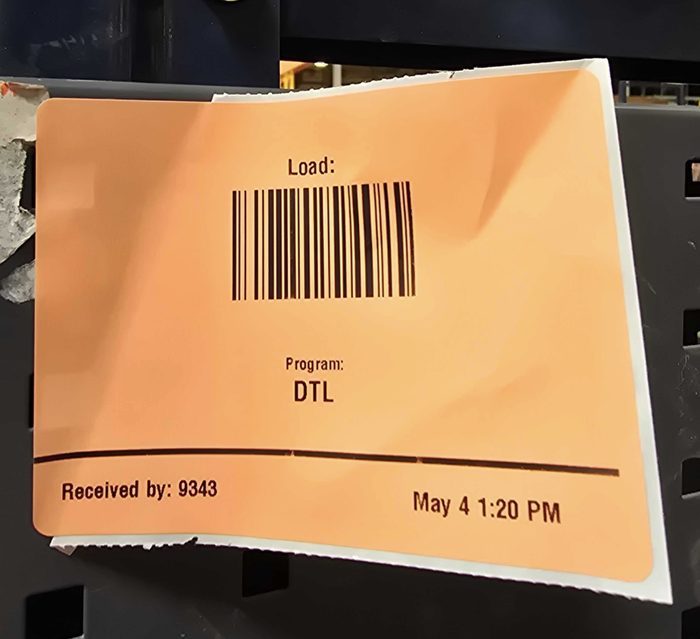
Scan the orange label that is placed on the staged inventory pallet. The orange label will come in one of two forms:
- Pallet ID Sticker: A Pallet ID sticker is printed and affixed to a pallet when the Material Handler receives the load through the “Direct to Staging” function, which is used to tag and store pallets when they cannot be processed immediately. As an Inventory Processor, you will scan 1 label from every pallet brought to your station as each pallet has a unique Pallet ID sticker containing a unique barcode. A pallet is considered done once you have processed all of the inventory from the pallet and a new pallet has been dropped off/staged at your station. At this time, you should discard your previous Pallet ID Sticker into the trash, place the new sticker into the magnetic clip and scan it into the Processing application within Cargo.
- Load ID: A Load ID sticker is printed and affixed to a pallet when the Material Handler receives the load through the “Direct to Processing” function, which is used to tag pallets, speedpacks or other containers with inventory that is intended to be processed immediately (not stored for future processing). As an Inventory Processor, you will scan ONE TIME only, so long as you are being presented with pallets from the same Load (although, it does not hurt anything to scan subsequent Load ID stickers if you choose to; it is simply an unnecessary step). You are only required to scan a new Load ID Sticker if a new pallet is given to you by a Material Handler containing a different Load ID. If in doubt, request Manager assistance.
Remove and Store the Orange [Pallet] or [Load] Label
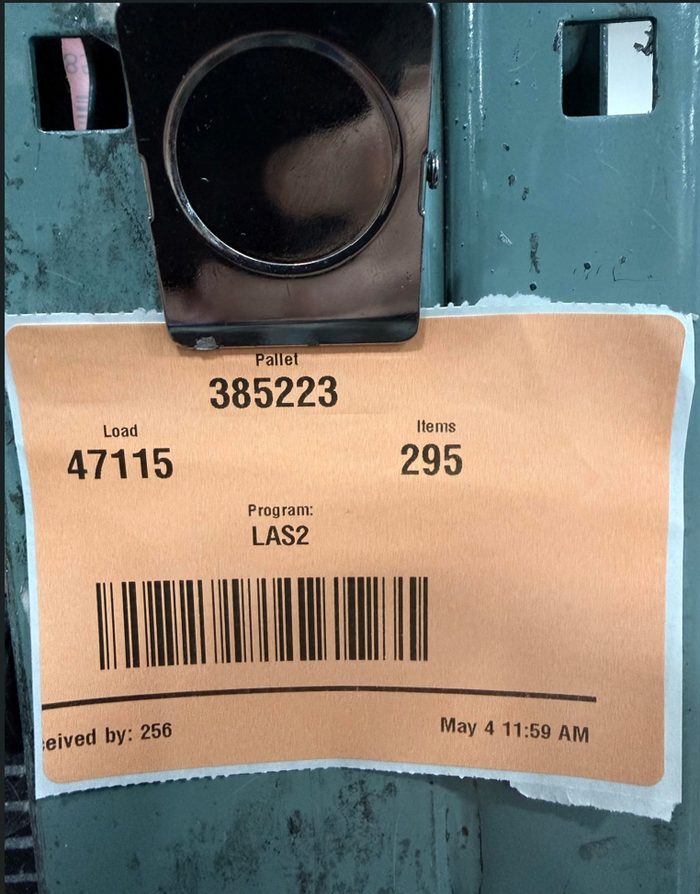
Take the orange label off of the staged pallet and hang it from the magnetic clip at your station. If you do not have a magnetic clip at your station, request one from your Manager.
Orange labels should NOT be stuck to rack uprights, mobile media carts, or other company assets. Storing orange labels in the magnetic clips allows Area Managers and other leaders to efficiently locate them when required and keeps equipment looking clean and sticker/residue free.
Again, Pallet ID Stickers should be discarded immediately upon moving on to the next Pallet & Pallet ID Sticker. Load ID Stickers should remain on your magnetic clip for the duration of the load until a pallet from a new load is presented.
The orange sticker that is on your magnetic clip should ALWAYS correspond with the inventory that you are currently working at your station.
Cleanliness Tip:
At the end of your shift, take a moment to:
- Check your station
- Throw away any old or unused/duplicate orange labels
- Keep your area clean and free of aged so labels don’t get mixed up later
Open the Box or Packaging
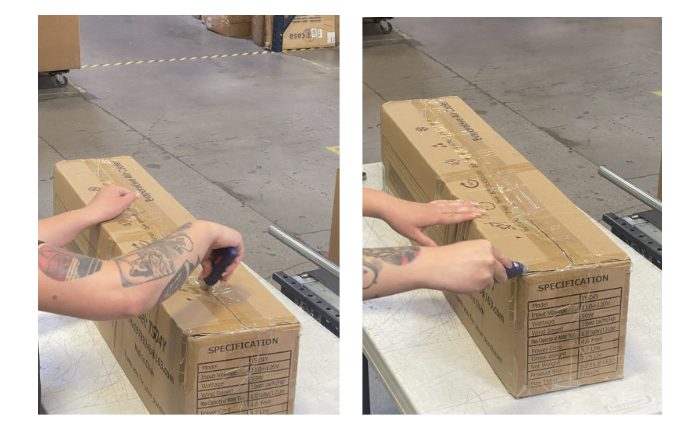
- Put the box on a flat, stable surface (like your table or station).
- This keeps the items from sliding, tipping, or falling out.
- Use the approved tools (box cutter, safety knife, etc.) provided by management.
- Do not use random or personal tools. If you do not have the required tools to perform the job, please escalate to a Manager immediately and request them.
- Carefully cut open the box.
- Cut slowly and stay in control. Always cut away from your body to minimize the chance of injury.
- Once open, remove all packing materials, such as:
- Tape
- Bubble wrap
- Foam
- Paper
- Make sure the item is fully visible and easy to access before moving to the next step.
Scan the Item Barcode (UPC / LPN / ASIN / X00 / ISBN)
Find the barcode on the item. This could be a UPC, LPN, ASIN, X00, or ISBN. Use your scanner to scan the barcode into the “Identify” field. Make sure it beeps/scans correctly before moving on.
After scanning, look at the screen and make sure everything matches the item in your hands:
- Category: What type of item it is. This field contains a finite list of predetermined categories; select from list.
- Lead Description: Listing name/title of the item being processed.
- Retail Price: The retail price established by the original retailer from which Nellis Auction acquired the item.
- Stock Photo: A professionally edited photo of the item used in the original retailer’s listing.
- Ask yourself: “Does this screen match what I’m holding?”
If the Item DOES NOT Match or there are major differences:
- Stop and do NOT continue processing the item using normal procedures.
- Instead, follow the LPN Exception Workflow in the Common Exceptions section of this document.
If the Barcode Details are Wrong:
- Click the warning triangle (!) next to the Identify field to report it. This helps flag bad or incorrect item level data to help improve our data over time.
- (Note: This feature may still be in progress.)
Always take a few extra seconds to double-check —
Catching a mismatch early prevents bigger mistakes or rework later.
ITEM TIMER - Pro tip
Callout box: Once you begin processing an item, the Item Timer in the upper left of the form will begin counting down. The timer is program-specific and is designed to help you stay on pace with your program's processing goals. If the timer reaches zero, it will continue into negative time as a visual reference only — no system action is triggered. Use the timer as a guide to maintain your processing speed throughout your shift.

Toggle Adult Item 18+ (If Applicable)
If the item is age-restricted (see applicable product categories below), toggle the Adult Item 18+ switch in the upper right corner of the form.
This flag is used to identify items classified as adult content within the system. When applied, it ensures these items are segregated from general inventory. By enabling this flag, the item is automatically categorized as an adult-specific listing group. This helps maintain clear organization and prevents adult items from being unintentionally mixed with general products.
- Tobacco & Nicotine Products — Cigarettes, cigars, chewing tobacco, nicotine pouches, vaping devices, e-liquids, and related accessories
- Alcohol — Beer, wine, liquor, and any other alcoholic beverages
- Adult Toys & Novelties — Sexual wellness products, adult novelty items, and related accessories
- Sexually Explicit Content — Adult magazines, videos, books, or any media containing explicit material
- Weapons & Weapon-Adjacent Products — BB guns, airsoft guns, pellet guns, slingshots, tasers, pepper spray, and similar items that may be age-restricted depending on local regulations
- Firearms & Accessories — Ammunition, gun parts, and firearm-related products
- Gambling-Related Products — Lottery tickets, gambling accessories, or items associated with games of chance
- Drug Paraphernalia — Pipes, bongs, rolling papers, and similar items where restricted by law
- Mature-Rated Media & Games — Video games, films, or other media with an M (Mature) or NC-17/R rating intended for adult audiences only
- Any Other Age-Restricted Items — Products regulated or restricted to adult consumers (18+) by law or company policy

Toggle Multiple Items (If Applicable)
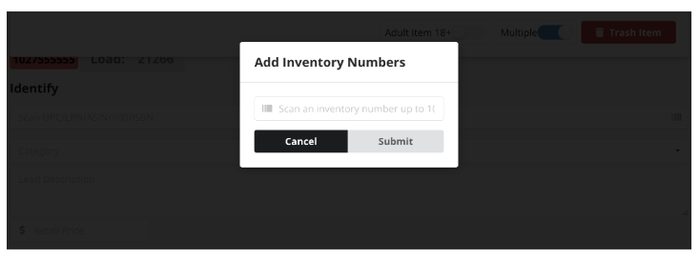
If you have more than one of the exact same item, you need to turn on Multiple.
- “Exact same” = same item, same brand, same size, same everything.
Tap the Multiple button on your screen.
- It is located between the 18+ button and the Trash button.
Enter the Quantity
- After turning on Multiple, enter how many of that item you have.
- Count carefully before entering the number.
Maximum Limit (IMPORTANT)
- The system (Cargo) allows up to 10 items at one time.
- If you have more than 10, you must split it into smaller groups:
- Example:
- 14 items = submit 10 first, then submit the remaining 4
Complete Multiple Item Submission (If Applicable)
If you turned on the Multiple button earlier:
- A new screen will pop up after you hit submit.
Enter the Quantity
- Type in how many of that item you have.
- Count your items carefully before entering the number.

Complete the Grade Survey
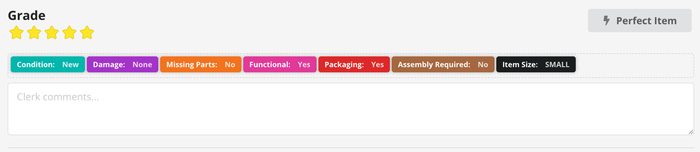
Answer each grading question to accurately describe the item. The system calculates a 1–5 star rating. Use the Perfect Item shortcut button only when all conditions are met.
1. Condition
Look at the item as a whole. Ask yourself: Is it new, used, worn, or rough?
Pick the option that best matches what you see and use your best judgement.
2. Damage — Note any visible damage to item or packaging.
Check for any visible damage, including:
- Scratches
- Cracks
- Dents
- Tears in packaging
If you see damage → mark it accordingly: Major or Minor
If not → Mark None
3. Missing Parts Default answer is NO.
Only choose YES if you are 100% sure something is missing.
Choose Partial Set if:
- It is part of a multi-box item
- Example: “Box 1 of 2”
4. Functional
The default answer is YES.
If possible, test the item to ensure it turns on. This is not intended to test that all of the item’s intended features fully function as our testing procedures are limited to power & basic functionality only. Only select NO if you are sure it does not work, if the item does not turn on.
5. Packaging
Check if the item has its original box/manufacturer packaging.
Select the option that matches what you see. If you are not certain if the product packaging is original, default to Yes.
6. Assembly Required
Ask: Does this item need to be put together?
Select YES or NO based on your best judgement.
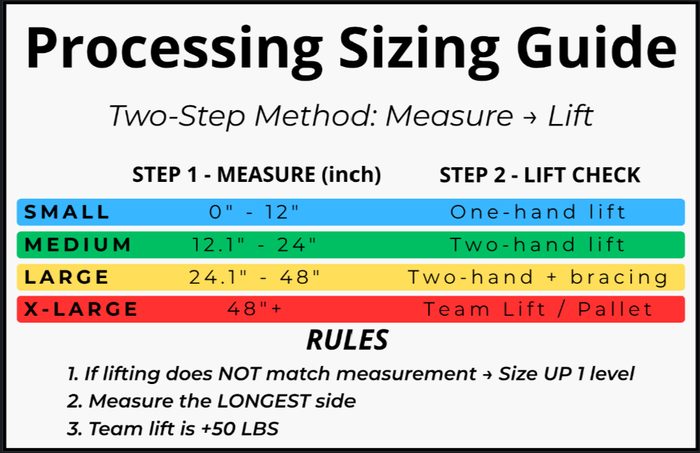
7. Item Size — Determine by physical handling:
- Small: Pick up with one hand (less than 12 inches)
- Medium: Requires two hands (less than 24 inches)
- Large: Hard to lift overhead (over 24 inches)
- Extra Large: Team lift required due to size and/or weight
⚠ Quick Tip:
When in doubt, slow down and double check — accurate grading minimizes returns and provides a great customer experience.
Apply the Inventory Number Sticker
Find the Inventory Number sticker for the item.
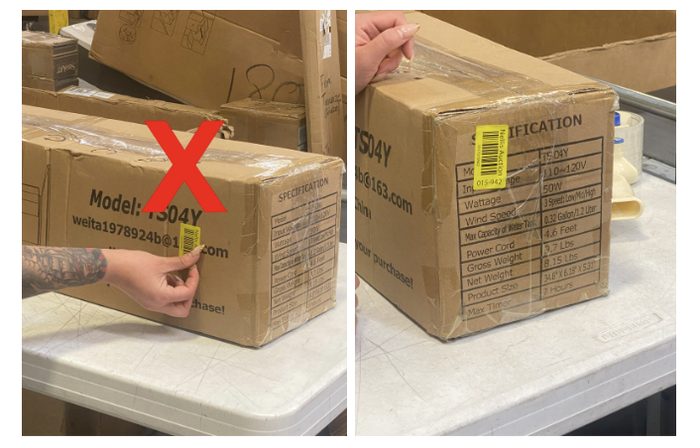
- Make sure the Inventory Sticker that you apply to the box matches the inventory sticker that you scanned into the processing application. This is critical to prevent inventory mismatches later on.
Place the Inventory Sticker in the Correct Spot on the Box
- Apply the Inventory Sticker to the small side of the box.
- This is the shorter side (not the long front or back).
- It should be the side that will be easy to see when stored on the shelf.
- Example: If a box is 10” x 20” x 5,” the inventory sticker should be placed on the 5” face.
Prep the Surface
Before placing the sticker:
- Make sure the surface is clean and dry
- Wipe off any dust, dirt or debris to ensure a strong stick
⚠ Quick Tip:
Do not place stickers over:
- Other barcodes
- Important labels
- Open seams or edges
- Wrapped around corners or edges
👉 Bad placement can make items hard to scan or cause labels to fall off.
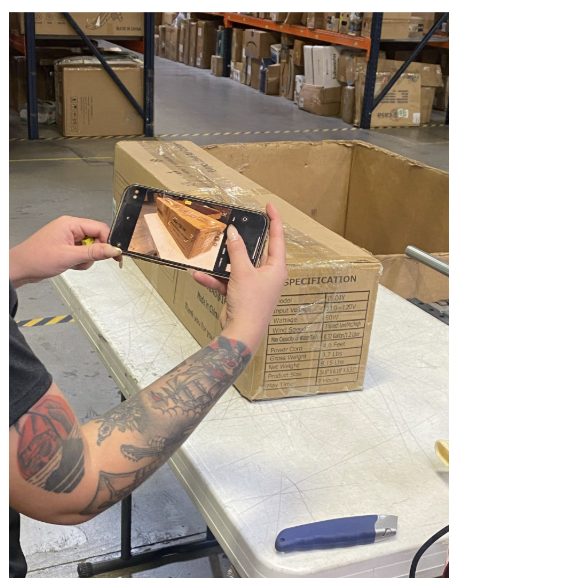
Capture Required Photos
Take the required number of photos based on the item's retail price tier. Refer to the Processing Photos Reference section.
- Stock Photo — from the Amazon listing or other reliable source
- Live Photo — of the actual item. CARGO WILL NOT ALLOW SUBMISSION WITHOUT AT LEAST ONE LIVE PHOTO.
- Box Photo — with the Inventory Number label visible in the shot
- Damage Photos — additional photos of any deviations from a perfect item. For example, if you marked it used or damaged, include a photo to help tell the story to the customer.
Extra Photos for Electronics
If the item is an electronic device, you also need:
- Serial Number Photo
- Take a picture of the serial number on the item itself
- Do NOT rely on just the box. Open the box and look at the item’s serial number.
- Power-On Photo
- Show the item turned on to prove that it is functional
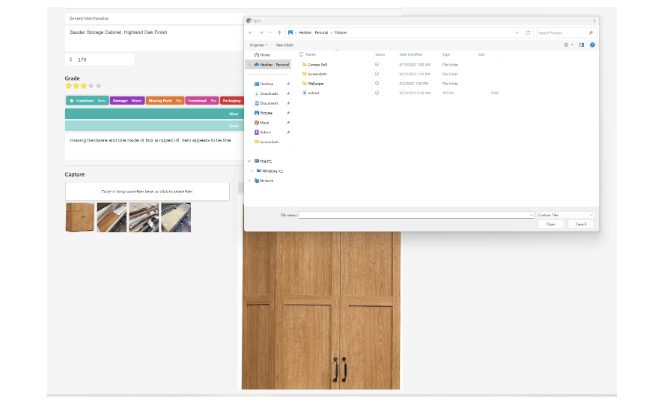
Upload Photos to the Cargo Listing
Upload photos in the Capture section in this order:
- Go to the Capture section on your screen.
- Upload your photos in the correct order (see below).
Upload in This Order (IMPORTANT)
- Stock Photo (FIRST)
- Upload the photo from Amazon or another trusted site first (if not already ingested from initial barcode scan).
- Live Photos + Box Photos (SECOND)
- Upload all photos of the actual item
- Include the box photo with the Lot Number sticker
- Damage Photos (LAST)
- Upload any photos showing damage at the end
Check Your Photos Before Submitting
- Make sure all photos are:
- Right-side up (not sideways or upside down)
- Clear and easy to see
- Showing the full item
- Re-Order Photos:
- If you do not like the order of your photos, you can click the photo you want to re-order and then click the photo where you want to swap positions with. The photos will immediately re-order.
IMPORTANT RULE
🚫 The system will NOT let you submit without at least one live photo
Add Clerk Comments (If Applicable)
Use Clerk Comments to add extra details about the item. This helps give more information to buyers, pickers, and the next team. Only add comments when there is something important to note.
Add a comment if you see or know any of the following:
- Damage — Item
- Example: “Scratch on front”, “Crack on side”
- Damage — Packaging
- Example: “Box torn”, “Box heavily damaged”
- Missing Parts
- Only if you know what’s missing
- Example: “Missing remote”, “No charger included”
- Size
- If the size might not be obvious
- Example: “Oversized”, “Very small item”
- Serial Number
- If needed for tracking
- Example: “SN: 123456789”
- Expiration Date
- For items like food, supplements, etc.
- Example: “Expires 05/2026”
- Unable to Test
- If you could not test the item
- Example: “No power cord to test”
- Factory Sealed
- If the item is still sealed
- Example: “Factory sealed, unopened”

Click Submit
- Before submitting, take one last look at everything:
- Item info
- Photos
- Quantity
- Grade survey
- Comments
Make sure everything is complete and correct.
If You Made a Mistake
- Tap the Clear Form button
- This will erase EVERYTHING you entered
- You will need to start over from the beginning
⚠ Use this carefully — nothing will be saved
NOTE: If you manually entered item information and could not identify the item, a manager MUST review and verify the listing BEFORE you Submit.

Trash Item
The ONLY reasons to trash an item:
- Hazardous or Recalled — Item presents a health or safety risk that cannot be neutralized by normal handling. Trash if: the item is on an active recall list; packaging is compromised on a chemical product (leaking cleaning solution, punctured aerosol, damaged pesticide container); baby formula, infant food, or infant medication is expired; a space heater, electric blanket, or power strip has visibly damaged wiring or has been subject to a fire-related recall; a battery is cracked, swollen, or leaking. If you are unsure whether an item has been recalled or whether the hazard qualifies, do not trash it — set it aside for a manager to verify.
- Severe Damage — The item cannot perform any version of its intended function AND has no plausible resale pathway, including as-is, for parts, or for scrap. Damage must be objectively verifiable. Trash if: a large appliance (washer, dryer, refrigerator) has been structurally crushed and cannot be moved or operated in any capacity; a piece of furniture has collapsed completely and no individual component has standalone value; a TV or monitor screen is shattered into fragments with the panel destroyed beyond any display function and the board has no parts value; a small appliance has melted or burned through (e.g., a blender or air fryer that caught fire); glass items are shattered into sharp fragments with no remaining aesthetic or functional value. Cosmetic damage, dents, scratches, cracks, or items that simply do not power on do not qualify — these are listed as-is.
- Missing Core Component — The part that is missing is the mechanism that defines what the item fundamentally is, and without it the item has no function and no parts value. Trash if: a blender or food processor has no motor unit and the housing alone has no scrap or parts value; a TV or monitor has no screen and no board components with resale value; a power tool has no motor and the shell is not sought after for parts; a lamp or light fixture has no electrical socket and the frame has no aesthetic resale value. If the missing part is a cord, remote, cable, lid, tray, or accessory — that does not qualify. If you are unsure whether what is missing is a core component or an accessory, escalate to a manager.
- Contaminated Item — Item has been exposed to biological or environmental contamination that cannot be resolved with basic cleaning and poses a genuine risk to handlers and future buyers. Trash if: upholstered furniture (mattress, sofa, chair, pillow) has visible bodily fluid staining that has penetrated the material; any soft item (bedding, clothing, stuffed animals) shows evidence of rodent activity, insect infestation, or bed bugs; a porous item (foam, wood, fabric) has active mold growth that has penetrated the surface and cannot be wiped away; any item has an odor so severe (smoke saturation, urine, animal waste) that it would be unreasonable to expect a buyer to remediate it. Surface dirt, dust, mild smells, or mold on hard non-porous surfaces (glass, metal, plastic) that can be wiped clean do not qualify.
Why we don’t throw items away:
- Almost everything can have value – Even items that look cheap or have no data might sell to the right customer. Throwing them out means lost revenue.
- Stay consistent – Everyone should follow the same rules. If people decide on their own, it causes confusion, mistakes and inconsistency in our processes.
- Track everything – Every item matters. Throwing things away without approval creates inventory issues and lack of accountability.
Manager Approval Requirement:
- Do NOT throw any item away without manager evaluation and approval.
- Once an item is considered trash, it must be reviewed by a manager.
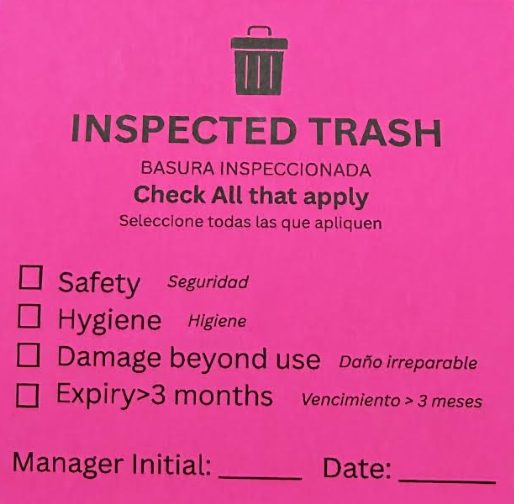
- If the manager approves the item to be trashed, an “Inspected Trash” sticker must be placed on the item.
- The sticker must include:
- Manager initials
- Date inspected
- Reason for trashing:
- Safety
- Hygiene / contamination
- Damaged beyond use
- Expired
Expectations:
- Do NOT throw items away on your own.
- If unsure, ask a supervisor or manager.
- Focus on saving and selling as much as possible.
- Use the grading options available to document all damages within each item before considering it trash.

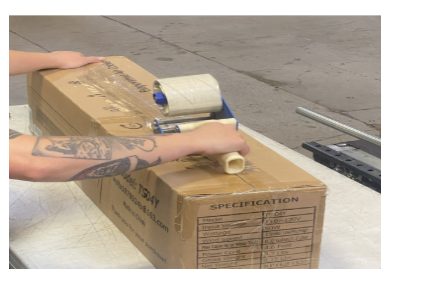
Tape and Seal the Item
- After the item is fully processed and submitted, it’s time to close it back up.
Close the Box
- Fold all flaps down properly
- Make sure everything is lined up and closed flat
Tape the Box
- Use the approved tape at your station
- Tape along the main opening seam of the box
- Add extra tape if needed, especially if:
- The box feels loose
- The item is heavy
- The box is damaged or worn
Make Sure It’s Secure
- Check that:
- The box is fully closed
- Nothing can fall out
- The tape is stuck down firmly
⚠ Quick Tip:
If you wouldn’t feel comfortable picking it up by the box, it probably needs more tape.
👉 A properly sealed box prevents damage and keeps items safe during storage and prevents safety incidents.
Stage Processed Inventory
After processing an item:
- The Inventory Processor Submits the item on Cargo.
- The Processor pushes the item down the belt or places it directly into a PutAway Speedpack (depending on your station setup and item size)
- A Put-Away team member downstacks the belt and collects the processed inventory.
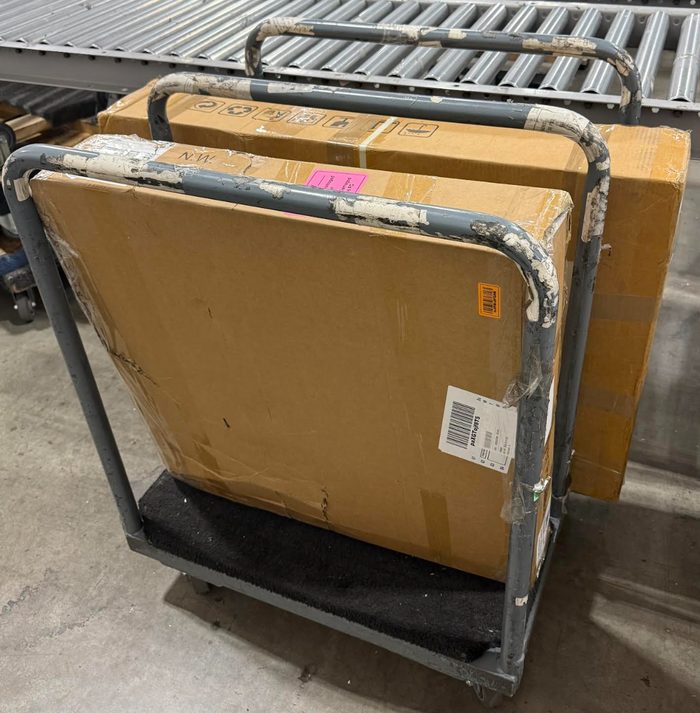
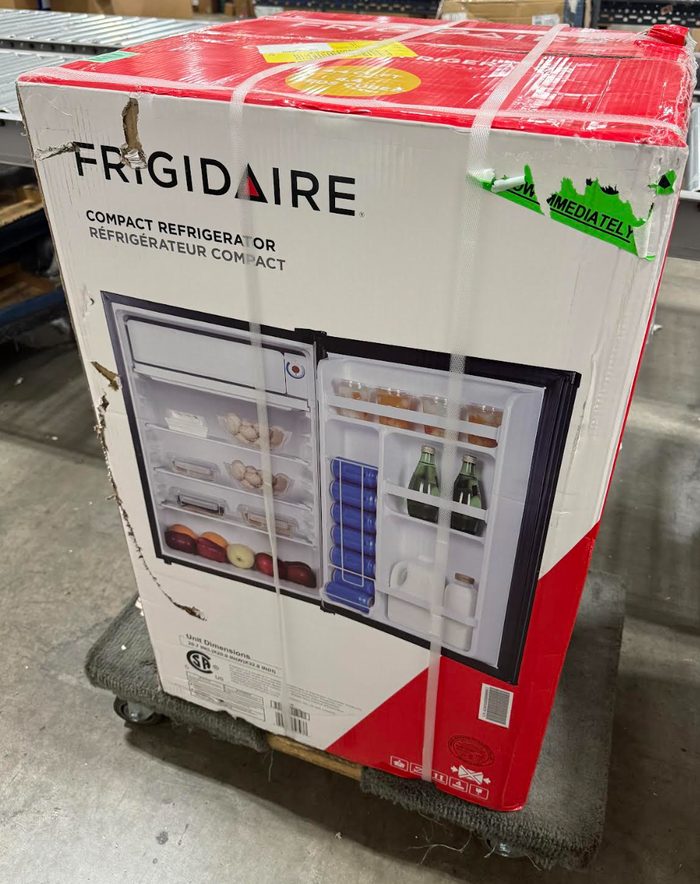
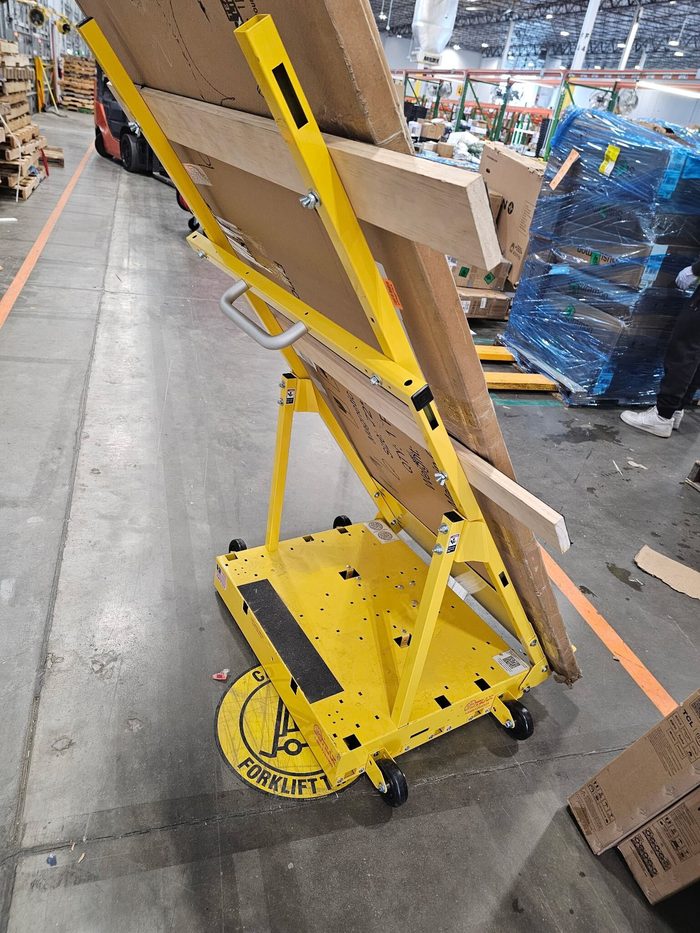
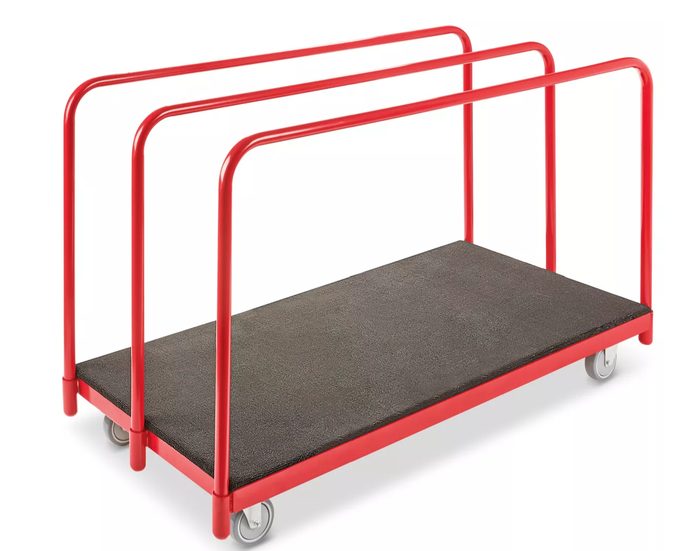
- Items are placed into PutAway Speedpacks, Carts or Dollies depending on size and transported to a warehouse storage rack.
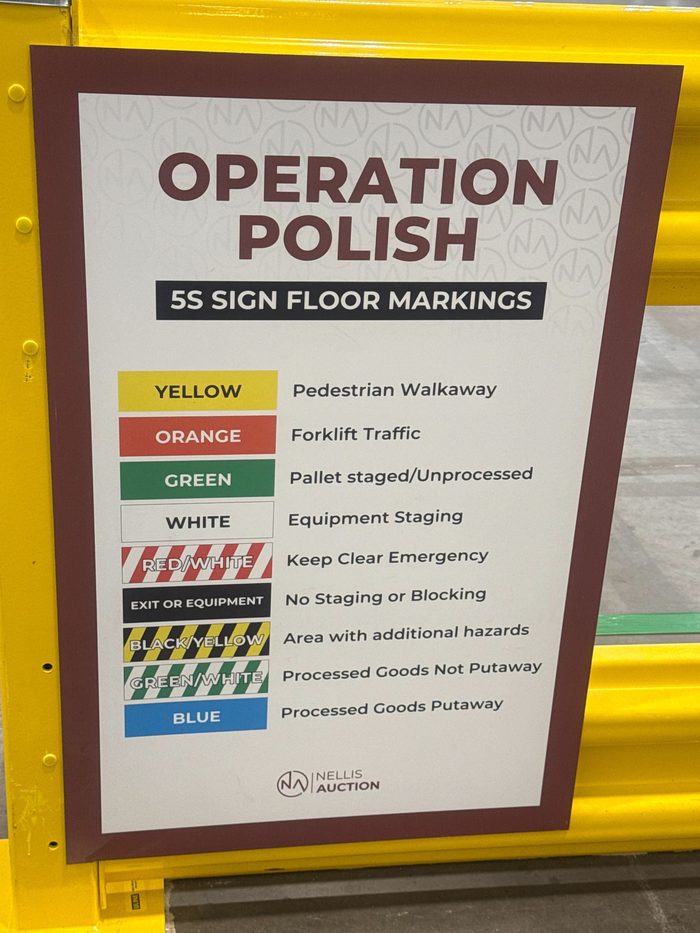
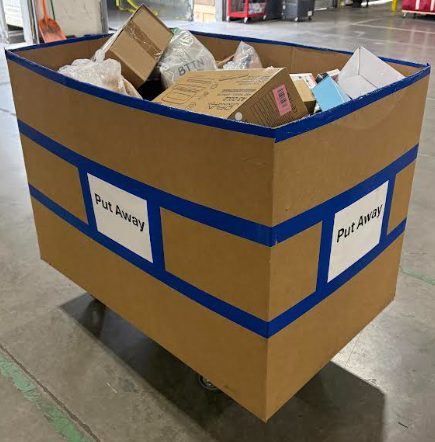
PutAway Speedpacks, Carts and Dollys are normally located next to the processing tables or conveyor belts for easy access. Speedpacks can be identified by the “PutAway” sign and blue tape labeling.
Use the correct container or equipment based on item size:
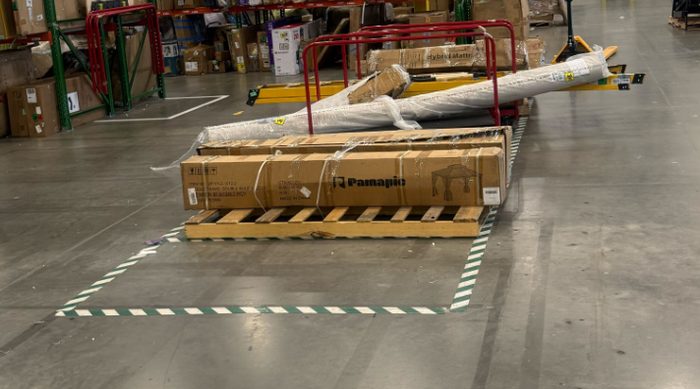
- Small Items (S) → MUST be placed into a PutAway Speedpack. Processed not putaway items are then staged in the white and green taped zones.
- Large/Medium Items (L/M) → May be placed into a PutAway Speedpack or moved using a cart/doll. Processed not putaway items are then staged in the white and green taped zones.
- Extra Large Items (XL) → MUST be moved using a cart or dolly and should NOT be placed into a Speedpack. Processed not putaway items are then staged in the white and green taped zones.
Processor Expectations:
Inventory Processors are only responsible for moving items far enough to clear their workstation for the next item.
- Do NOT take inventory to storage racks
- Do NOT leave items blocking walkways or work areas
- Continue processing the next item immediately after clearing your station
Put-Away employees are responsible for transporting, staging, and storing inventory in warehouse rack locations.
⚠ Quick Tip:
Keeping the staging area clean and organized helps the Put-Away team work faster, prevents damaged items, and keeps walkways safe for everyone.
No-Sale Mixed Variety Box Workflow
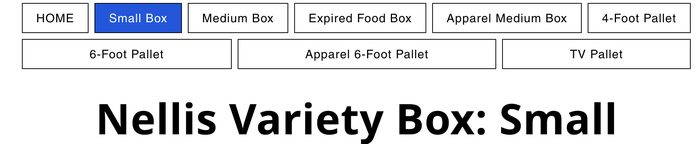
Utilize the Wix site to help identify your correct box/pallet type.
First, figure out what you’re working with:
- Box or Pallet
- Then choose the correct type:
- Small Box
- Medium Box
- Expired Food Box
- Apparel Medium Box
- 4-Foot Pallet
- 6-Foot Pallet
- Apparel 6-Foot Pallet
- TV Pallet
- If you’re unsure, make your best guess based on size and contents or escalate to a Manager for review.
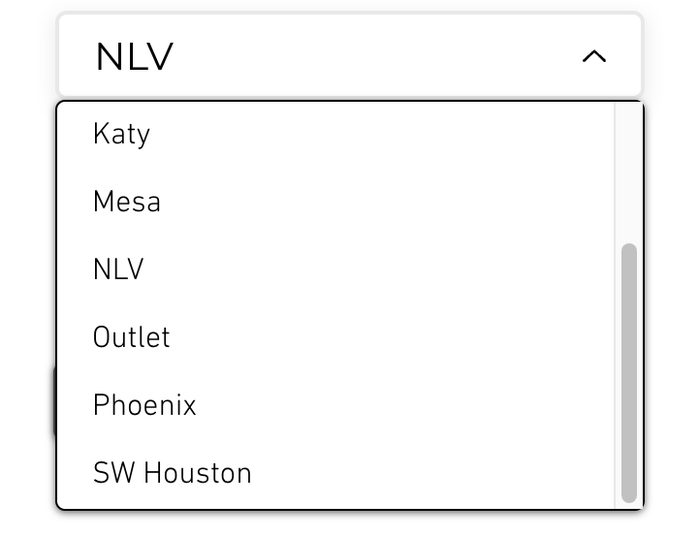
Step 2: Choose Your Building
- Select your facility location (example: HOME or your assigned warehouse).
- This ensures the item gets tracked correctly.
Step 3: Generate Load ID
- Once facility location has been selected, your Load ID will be generated
- Enter your load ID to your Processing page to begin creating your No-Sale item.
Step 4: Create the Listing Info
Use the standard info below (copy/paste style):
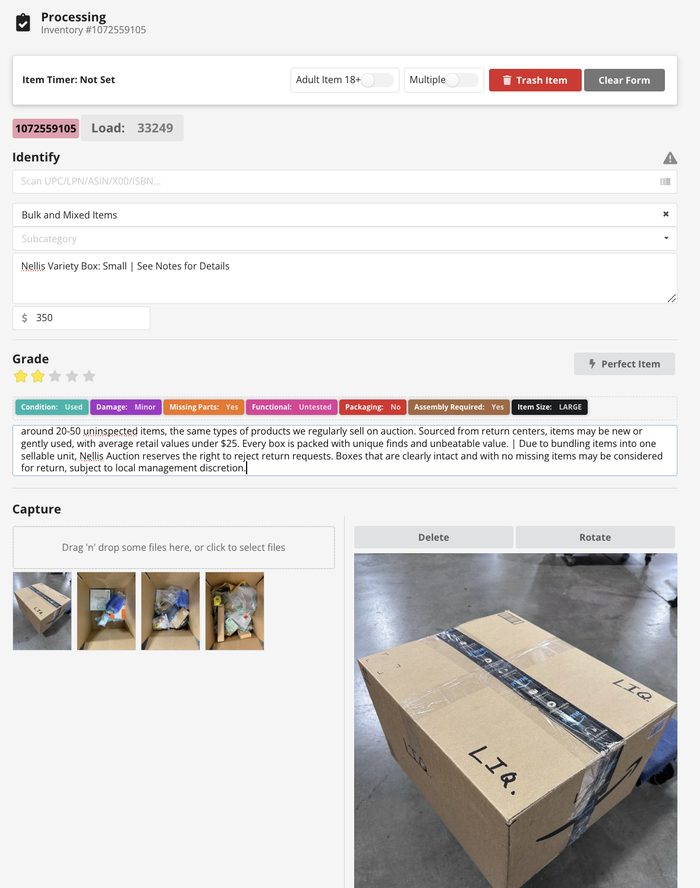
- Category: Bulk and Mixed Items
- Lead Description:
Nellis Variety Box: Small | See Notes for Details - Retail Value: $350
- Boxes - Require photos by layers of items added
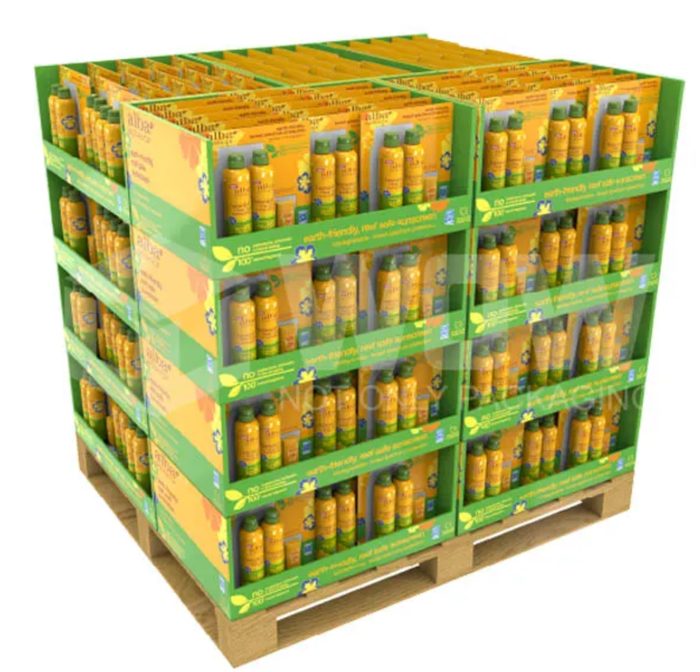
- Pallets - 3 photo requirements - add photo of pallet and 2 photos of any visible product from above.
Step 5: Set the Condition
Always mark no-sale items like this:
- Condition: Used
- Damage: Minor
- Missing Parts: Yes
- Functional: Untested
- Packaging: No
- Assembly Required: Yes
- Item Size: LARGE
Step 6: Add Clerk Comments (Important)
Clerk Comments, Copy and Paste based on the box size selected:
“Box Size: Approx. 20” x 20” x 15” | Why bid on one item when you can score a mix of unique finds in one go? Each small variety box contains around 20-50 uninspected items, the same types of products we regularly sell on auction. Sourced from return centers, items may be new or gently used, with average retail values under $25. Every box is packed with unique finds and unbeatable value. | Due to bundling items into one sellable unit, Nellis Auction reserves the right to reject return requests. Boxes that are clearly intact and with no missing items may be considered for return, subject to local management discretion.”
Step 7: Final Check Before Sending
✅ Correct box/pallet type selected
✅ Correct building chosen
✅ Description added
✅ Condition set
✅ Comments included
✅ Photos added
Direct-to-Liquidation (DTL) UPS Amazon Returns Process
Overview
DTL (Direct-to-Liquidation) is a UPS Amazon Returns program where return packages are sent directly to Nellis Auction facilities.
Each month, one DTL Load ID is assigned for all DTL inventory. This Load ID must be used when processing all approved DTL packages for that month. The DTL load ID will surface in load control/loads for close out reports, and may look like a load for potential closure if direct to processing is used.
DTL packages are processed the same way as regular inventory, with a few important differences:
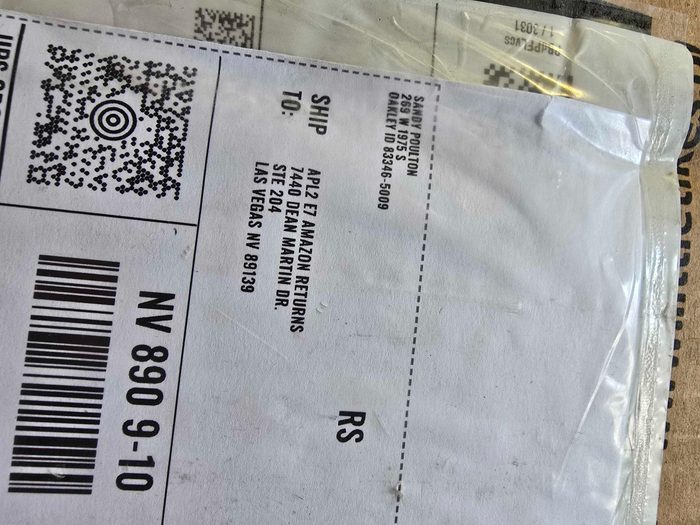
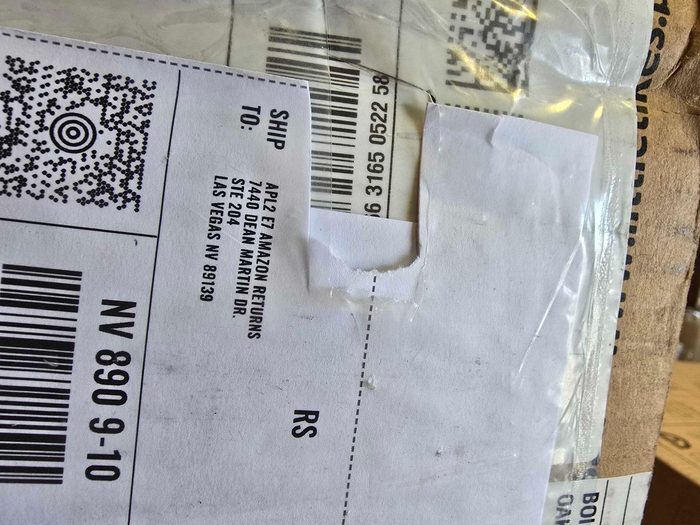
- The package must be verified as an Amazon Return referencing the “APL_ Amazon Returns” reference in the Ship To line of the shipping label.
- Customer address information must be removed
- Team members must watch for misshipped packages intended for other businesses or office suites in the building
DTL Receiving Setup
UPS will arrive in a box truck as a live load or UPS will bring a 53’ trailer and drop.
- Stage empty pallets to hand stack and hand wrap or stage Gaylords in the designated DTL receiving area
- Create pallet stickers as the product is unloaded and build pallets using the current monthly DTL Load ID. Processing Area Manager will provide Processors with this information. (Brian L)
NOTE: DTL Load IDs change monthly. Always verify you are using the current month’s Load ID before processing inventory. If in doubt, ask your Area Manager.
Verify the Package
Before processing any package under the DTL Load ID:
- Confirm the package is an Amazon Return referencing the “APL_ Amazon Returns” reference in the Ship To line of the shipping label.
- Watch carefully for misshipped packages or deliveries meant for other companies or office suites
- Pay close attention to shipping labels showing suite numbers, business names, or office locations
- “APL_ Amazon Returns” on the Ship To line.
- Example: “4031 MARKET CENTER DR ST 303”
IMPORTANT: Not every UPS package delivered to the building belongs to the Amazon DTL program. Associates must verify packages before processing to avoid inventory errors.
If a package appears questionable or belongs to another business:
- Set it aside
- Notify leadership or a supervisor for review
Remove Customer Information
Before processing the item:
- Cut off, or remove the customer return address label
- Ensure no customer personal information remains visible on the package
- Ensure no packing slip containing customer information is left inside the box
This helps protect customer information during processing, storage, and auction preparation.
Processing the Inventory
Once the package has been verified as a valid Amazon Return:
- Remove the customer address label
- Open the package and identify the inventory inside
- Remove packing slip if present
- Process the item using the current monthly DTL Load ID
- Use any available barcode on the inventory to process the item normally through Cargo
- Process and grade the item using standard inventory procedures
- Stage the completed inventory using normal put-away procedures
At this time, processors cannot scan the outside “1Z” UPS tracking barcode or RMA barcode, or any UPC available directly into Cargo for automatic item details. Associates must continue using available item barcodes from inside the package until future system integrations are implemented.
Expectations
- Always verify packages before processing
- Do NOT assume all UPS packages belong to DTL
- Use the correct monthly DTL Load ID
- Remove all customer address information
- Escalate questionable or misshipped packages to leadership
- Process DTL inventory using standard processing procedures once verified
The goal is to process DTL inventory quickly while maintaining accuracy and protecting customer information.


Process Flow Diagram
The following diagram provides a visual overview of the end-to-end process flow. Refer to the Procedures section for detailed step-by-step instructions.
□ PROCESSING PHOTOS REFERENCE
| Price Tier | Min Photos | Required Photos |
|---|---|---|
| $ — Under $50 | 2 | Stock photo Box photo (no need to open item) |
| Bagged Items (product visible in bag) | 2 | Stock photo 1 packaged photo Photo of any damage. Do not open if the product is clearly visible. Confirm stock photo matches live photo. |
| $$ — Under $250 | 3 min | 1 live photo 1 stock photo 1 box photo Damage/deviation photos |
| $$$ — Over $250 | 4 min | 2 live photos 1 stock photo 1 box photo Damage/deviation photos |
| $$$$ — Over $1,000 | 5 min | 3 live photos (min) 1 stock photo 1 box photo Damage/deviation photos |
| Electronics (all price tiers) | Additional | Photo of serial number ON the item • Photo of item powered on (proof of functionality) |
☆ PROCESSING CONDITION & GRADING REFERENCE
Condition Standards
| Grade | Criteria |
|---|---|
| PERFECT ITEM (5 Star) | Original packaging present • No damage noticed • No or unsure of missing pieces |
| NEW | Original packaging and/or factory sealed • No noticeable use |
| USED | Noticeable usage (wear and tear) • Missing original packaging |
Missing Parts & Functional Rules
| Field | Default | Rules |
|---|---|---|
| Missing Parts | NO | Default = NO • Select YES only if 100% certain parts are missing • Select PARTIAL SET for confirmed incomplete multi-box items (e.g., Box 1 of 2) • FORBIDDEN: Unknown |
| Functional | YES | Default = YES • Test the item; select NO only if non-functionality is proven • FORBIDDEN: UnTested |
Item Sizing Guide
| Size | Physical Test | Measurement |
|---|---|---|
| Small | Pick up with one hand | Less than 12 inches |
| Medium | Requires two hands to pick up | Less than 24 inches |
| Large | Hard to lift overhead | Over 24 inches |
| Extra Large | Team lift required due to size and/or weight | Team lift required |
▶ PROCESS FLOW OVERVIEW
The following table provides a high-level overview of the end-to-end inventory processing flow. Refer to the Procedures section for detailed step-by-step instructions.
| Step | Action | Role | Key Output |
|---|---|---|---|
| 1–2 | Log into Cargo, select Load ID or Pallet ID mode | Team Member | Processing mode set |
| 3–4 | Scan orange label, store label appropriately | Team Member | Load/Pallet linked |
| 5 | Open box/packaging for inspection | Team Member | Item visible |
| 6 | Scan barcode, verify item details | Team Member | Item identified |
| 7–8 | Toggle Adult 18+ and/or Multiple (if applicable) | Team Member | Flags set |
| 9 | Complete Grade survey (all 7 fields) | Team Member | Item graded 1–5 stars |
| 10 | Apply Lot Number sticker | Team Member | Item labeled |
| 11–12 | Capture and upload required photos | Team Member | Photos attached |
| 13 | Add clerk comments if applicable | Team Member | Notes logged |
| 14 | Submit (Manager verify if manual entry) | Team Member / Manager | Listing created |
| 15 | Complete multiple item batch if applicable | Team Member | Batch submitted |
| 16 | Tape and seal item | Team Member | Item secured |
| 17 | Stage for put-away team | Team Member | Ready for storage |
The Nellis Standard
The following standards are extracted from this SOP and represent the key observable, auditable behaviors and outcomes that define excellence in this process. These standards feed into the Nellis Auction master audit framework.
We believe every item has a bidder. We earn the sale through transparent listings — accurate grading, honest photography, and attention to detail — so everything but true trash gets its shot at auction.
Quantitative Metrics
S&OP Unit Throughput Budget - A collective measure of total units processed in a given time period according to the budgeted processing targets as stated in the official Finance-approved budget and S&OP inbound planning tool (see S&OP file for program-level details).
PPH (Points Per Hour) — The number of points an individual employee earns in one hour for the collective direct actions they perform (e.g., loading out). Goal: >=100 PPH. In Inventory Processing, points are tied to actions such as Item Processing Finished and Multi-Item Processing Finished at the program profile level.
Gap Time — The amount of time, measured in minutes but typically reported as a % of total time, where an employee was not in an active state performing direct work. Goal: <=10% (example: 10% × 570 mins = ~57 mins).
Observational Metrics
Work Station Cleanliness - Inventory Processor workstations are well-maintained and free of excessive debris and clutter. Inventory Processors clean throughout their shift and maintain a safe, professional work station that is conducive to productive work.
Full Conveyors - Although more of an indicator of Material Handler performance, conveyor belts are expected to be full of ready-to-process inventory at all times. Empty conveyor belts are indicative of an upstream process breakdown or insufficient staffing and can have material impacts to daily processing throughput.
Net Zero - The Inventory Processing area is free and clear of processed goods at the end of each shift, contributing to the Processed-Not-Putaway metrics of <=1% of daily processed items. Work stations are clean and organized and all equipment is accounted for.
Inventory Processors & Inventory Processing Area Managers understand and believe in our underlying processing philosophy that Every item has a bidder. It is our job, through transparent listings, to convert them to buyers. With the exception of strict trashing criteria, we make our best attempt at selling every item we receive from our retail partners and expel a small fraction of unsellable inventory only after strict scrutiny by Management.
Inventory Processors control load integrity by always scanning the correct Pallet or LoadID tag (orange sticker) before processing and always ensure that only one sticker is present at the work station at a time to minimize load cross-contamination.
The retailer’s item barcode is scanned into Cargo and verified for accuracy to capitalize on automated data ingestion processes prior to manual grading.
The Adult 18+ toggle is consistently used for all age-restricted items.
Inventory items are properly and sufficiently taped and staged after processing to enable efficient and safe handling downstream.
Inventory items are handled with reasonable care at all times. Processors treat items the way they would want items they have purchased handled.
Common Exceptions
| Exception / Scenario | Resolution Steps | Reference Document |
|---|---|---|
| LPN / Barcode Not Found (No result in Cargo after scan) |
Follow this lookup sequence in order: Search for the item on Amazon.com and locate the product listing. Copy the ASIN (B00 number) from the Amazon listing. Paste the B00 number into the Identify field in Cargo and confirm the listing populates correctly. If not found on Amazon: Search for the exact item on Google and locate the correct product. Manually copy and paste all available information into Cargo: Category, Lead Description, and Retail Price. If still not identified: Use Google Lens (AI image search in Google) to photograph the item. Use the result to populate Cargo fields. If Google Lens does not return a result: Create the best description possible based on physical inspection. Flag a manager to review and verify BEFORE hitting Submit. |
Common Exceptions Document |
| Item Does Not Match Description or Stock Photo | Do not submit the incorrect listing. Check all sides of the packaging for an alternative barcode. Follow the LPN Exception Workflow above to locate correct item information. Use the Warning Triangle (!) in Identify to flag the mismatch. (Under development.) Escalate to manager if the correct listing cannot be confirmed. |
Common Exceptions Document |
Supporting Job Aids & Forms
| Document Name | Description | Link / Location |
|---|---|---|
| Inventory Processing Common Exceptions | Full list of common exceptions and resolution steps for the standard inventory processing workflow | [Link] |
| Processing Photos Reference (Q4 2025) | Visual guide showing correct Stock, Live, and Box photo examples for Sortable, Non-Sort, and Extra Large items | [Link] |
| Processing Condition Rubric | Quick-reference rubric for grading condition, sizing, Missing Parts, and Functional standards | [Link] |
| HOU3 Job Aid | Program-specific requirements and pro tips for processing HOU3 inventory | [Link] |
| Home Depot / Lowes Job Aid | Program-specific requirements and pro tips for processing Home Depot and Lowes inventory | [Link] |
Training & Certification
| Training Requirement | Audience | Frequency | Delivered By |
|---|---|---|---|
| Initial Onboarding Training | New Hires | Day 1 | Certified Trainer |
| SOP Update Training | All Team Members | Upon SOP Revision | Certified Trainer / Area Manager |
Certification Requirements
Quality Control & Auditing
Audit Schedule
Audit Schedule
| Audit Type | Frequency | Performed By | Documentation |
|---|---|---|---|
| Formal Processing Audit | Annually | Industrial Engineer or Assigned General Manager | TBD |
Non-Conformance Handling
All deviations from this SOP will be addressed using a progressive accountability process to ensure compliance and continuous improvement.
Process Steps:
- Journal Acknowledgement
- Initial documentation of the issue.
- Team members acknowledge the expectation and correct process.
- Coaching 1
- First formal coaching conversation.
- Focus on reinforcing correct procedures and expectations.
- Coaching 2
- Second coaching session if behavior continues.
- Additional guidance and clarification provided.
- Corrective Action 1
- Formal corrective action issued.
- Documented performance concern with clear expectations for improvement.
- Corrective Action 2
- Escalated corrective action for repeated non-compliance.
- Corrective Action 3
- Final level of corrective action.
- May result in further disciplinary action up to and including termination.
Expectation:
All team members are expected to follow SOP procedures at all times. Failure to comply will result in progression through the steps outlined above.
Safety & Compliance
Safety Requirements
This section outlines the process for inventory processing and item description, focusing on the safe execution of all physical tasks. Key activities include safe lifting and movement of items, using proper techniques for cutting and slicing with approved tools, securely taping packages, maintaining good ergonomic posture while standing and typing for data entry, and adhering to all safety requirements to prevent injury.
Lifting & Physical Safety:
- Use proper lifting techniques: maintain a wide base, hinge at the hips, squat down, and keep the load close to the body.
- During movement, lead with the hips to avoid twisting the torso, and keep the load within the Power Zone (mid-thigh to mid-chest).
- Conduct a 5-Second Size-Up prior to lifting to test the load and ensure the path is clear of all trip hazards.
- Mandatory use of a Team Lift or Mechanical Aid (e.g., dolly/panel cart) for any heavy or awkward load.
Cutting Tool Safety (Box Cutters):
- Only use company-issued box cutters.
- Always cut away from your hands, body, and other team members; the blade must never cross your body or limbs.
- Blades must be sharp and kept in good condition. Dull blades require more force and increase injury risk.
- Retract the blade when not in active use.
- Do not cut deeper than necessary into packaging to avoid item damage.
Workstation Optimization:
- Maintain a processing station that is consistently free of debris and clutter.
- Ensure frequently used supplies such as scanners, tape, and labels are located within a 12-inch reach.
- Position the mouse and keyboard to facilitate a relaxed and comfortable arm posture.
- Set monitors at approximately eye level and at a distance of one arm's length.
- Keep feet positioned entirely on anti-fatigue mats and alert a Manager for an inspection or replacement if mats show signs of wear.
- Utilize shock-absorbing insoles and wear lace-up footwear that provides arch support.
- Avoid locking your knees; every 15 minutes, promote circulation by shifting weight side-to-side or from heel to toe.
- Do not twist at the waist or neck when scanning; always keep your shoulders squared toward the item.
Incident Reporting
All safety incidents, near-misses, and hazardous conditions must be reported immediately to ensure a safe work environment and proper documentation.
What to Report:
- Work-related injuries and illnesses
- Near-misses (events that could have caused injury or damage)
- Unsafe conditions (equipment issues, hazards, weather-related risks)
- Vehicle-related incidents in the parking lot
Reporting Process:
- Notify a Manager Immediately
- Report the incident to the Area Manager or supervisor as soon as it occurs.
- Do not delay reporting, even for minor incidents.
- Ensure Safety First
- Stop work if necessary.
- Move to a safe location.
- Assist any injured individual if it is safe to do so.
- Seek Medical Attention (if needed)
- For injuries, request first aid or medical assistance by contacting the Nurse Hotline.
- Call emergency services (911) for serious situations.
- Document the Incident
- Complete The Safety Hub report form with accurate details.
- Include time, location, individuals involved, and a detailed description of what occurred.
- Manager Documentation & Escalation
- The Manager will log the incident according to company policy.
- Injuries/Illnesses: Management to complete Slack notification for awareness. If the incident results in a medical visit, complete the Injury and Illness Incident Report (IIIR).
- Escalate to upper management, EHS or HR, if required.
- Follow-Up
- Follow all corrective actions or safety recommendations provided.
- Utilize the Incident Investigation Form to conduct a thorough investigation if requested.
Expectation:
Non-compliance with incident or hazard reporting protocols may lead to formal disciplinary measures. Timely notification is essential to mitigate operational risks and maintain a secure environment for all personnel.