
Standard Operating Procedure
Warehousing Picking
Warehousing · All Nellis Auction Locations
| Document ID | SOP_Operations_Picking_05.11.2026_V1 |
| Version | 1.0 |
| Effective Date | 5/27/2026 |
| Process Owner | Warehousing Area Manager |
| Department | Warehousing |
| Facility | All Nellis Auction Locations |
Purpose
The objective of this document is to cover the “Order Picking” and “Single Picking” process from start to finish, including examples and instructions for key scenarios and use cases. The “Order Picking” process or tool exists to pick individual customer orders. The “Single Picking” process picks single-item orders in a single revolution and consolidates them at once, saving time. Completing these tasks will ensure that all orders are picked and prepared safely, accurately, and in a timely manner, providing customers with a quick and pleasant pickup experience.
Scope & Audience
The scope of this SOP is limited to the “Order Picking” and “Single Picking” functions, and it will walk through the process step by step. This process applies to all facilities and product sizes, although the examples might be limited to specific cases. The variety of picking scenarios can range based on building-specific factors, program, item size, and facility-unique tools and equipment. The designated Area Manager and Certified Trainers will serve as Subject Matter Experts and can clarify any specific barriers during or after training.
All employees who will need to participate in “order picking” or “single picking,” including Pickers, any Warehousing employees, and any employees assisting in these functions through labor sharing, such as Customer Service employees, Inventory Processing employees, and management.
Roles & Responsibilities
| Role | Responsibility | Description |
|---|---|---|
| Order Picker | Pick individual customer orders | The Order Picker will safely, accurately, and efficiently pick, organize, and consolidate the customer's items for delivery before the customer's arrival. |
| Single Picker | Pick single orders through the Single Pick app only when assigned or instructed to do so | The Single picker will be assigned to or instructed to pick single-item orders in batches through the Single Pick app in Cargo. |
| Area Manager | Oversight and barrier assistance | The Area Manager will ensure that all employees are adequately trained to perform this task safely, accurately, and efficiently. The Area Manager will then monitor the timely completion of orders while remaining available to remove barriers, such as missing items in storage locations. |
| Certified Trainer | Training and feedback | The Certified Trainer should have sufficient experience in this role and considered a Subject Matter Expert. They should be prepared to conduct initial training for all new employees or those assigned to cross-training. All training should include reviewing the entirety of this document, and the document should be provided to the trainee for review. The Certified Trainer will also provide feedback on the training process, informing the Area Manager of the trained employee's proficiency after the introduction to the task. The Certified Trainer will also be asked to provide feedback on employees who may deviate from the expectations laid out in this document. |
Definitions & Key Terms
| Term | Definition |
|---|---|
| Cargo | Nellis Auctions' proprietary Warehouse Management System used to facilitate operations and complete the picking of orders. |
| Pick | Sometimes used to describe either an item destined to be picked or the order being picked itself. ex: “My next Pick is on aisle 18.” “My pick has 40 items.” |
| Single-Pick | A form of picking that is exclusive to picking single-item orders. These orders are picked in batches until they are ready to be dropped off. |
| Single-Pick revolution | A term used in this training to explain that single item orders are picked until the picking cart is full and a drop off it completed. One run of single item orders is one revolution. |
| Pick Path | A path that will lead us through our pick in a logical path, usually starting at the furthest location to the Consolidation Area. |
| 9-Bin Search | A term used to define the search area expected when an item is not found in its assigned bin. The search area includes every adjacent bin to the assigned bin. (Above, below, beside, and diagonally adjacent) |
| Customer Tag | A tag that will be printed in the final step of the picking process. This tag is printed by a label printer, at the print station, located at the end of the pick path. When we reach this step, we will use the QR code generated on the pick screen to scan it at the printer, then place the customer tag on the customer's items. |
| Print Station | An area where a printer is setup to print customer tags for the consolidation process. This will usually include an area where tables and tap guns are used to put items in totes or tape orders together before they are staged. |
| Consolidation | The final step in the process where items are staged in the Consolidation Area for curbside delivery. |
| Consolidation Area | The physical area where finished orders are staged. This area is full of locations or “Consolidation Locations” where an order will be staged. In this area, we have multiple locations such as: Shelf location: a shelf for storing small orders or binable orders Floor location: a location for storing orders that are most appropriate to be left on their cart or in a speed pack, often just below a shelf Single Item: A designated area or bin where only single items are staged |
| Labor IQ | A system that works alongside Cargo to help report performance data, time spent out of an assigned function, and tracks actions. Area Managers use this tool to gain insights into operations and individual performance. It can also be used to assign employees to tasks when they are not working in the Picking role. |
| Live, Live Order, or Is Here | 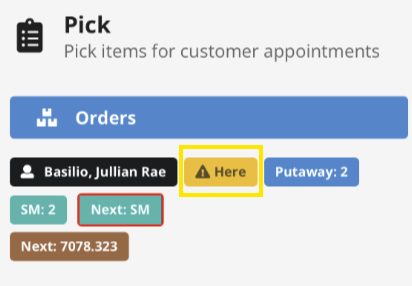 An order being picked while the customer is waiting in a parking stall. An order being picked while the customer is waiting in a parking stall. |
Required Supplies & PPE
| Equipment / Supply | Supplier / Item Number | Photo / Reference |
|---|---|---|
| Scanner | Data Logic / 944950001 |  |
| Scanner Sling | Ergodyne / 3134 | 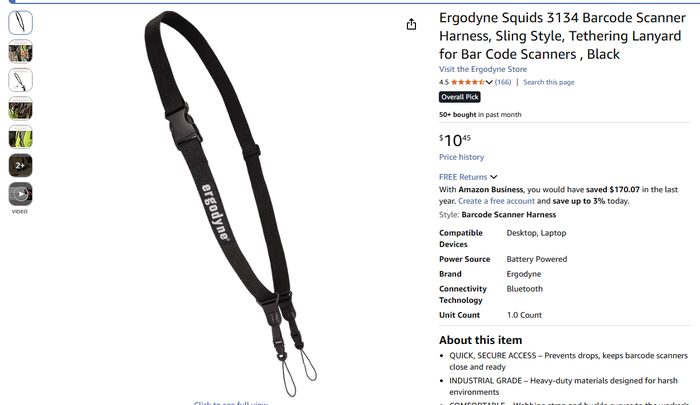 |
| Gloves (optional) | Dyneema (Uline) / S-14249 | 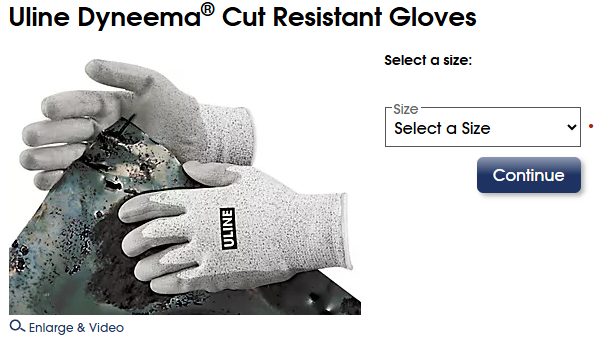 |
| Floor Dolly | Uline / H-967 | 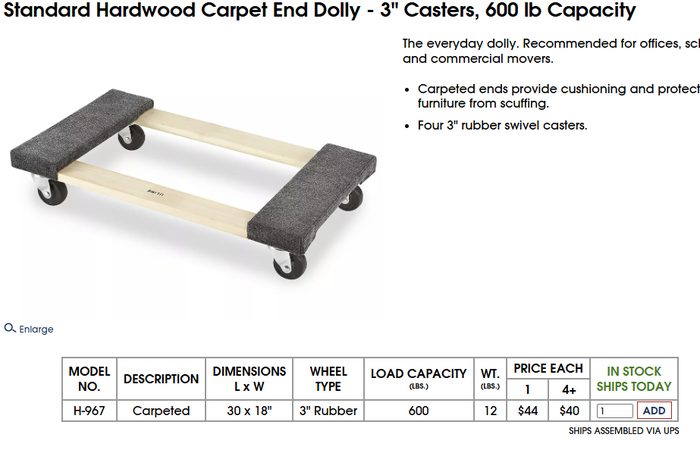 |
| Speed Pack | ??? / ??? | 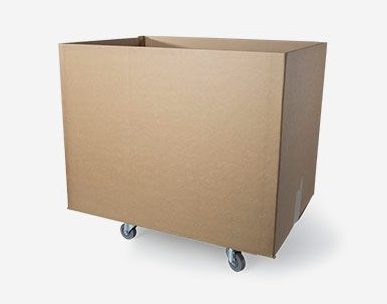 |
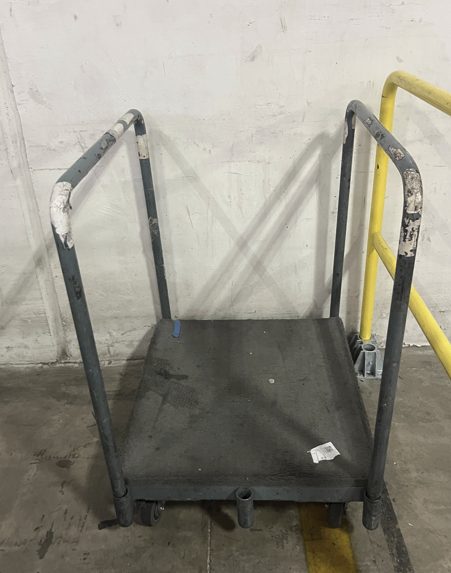
| Carpeted Panel Cart | ??? / ??? | 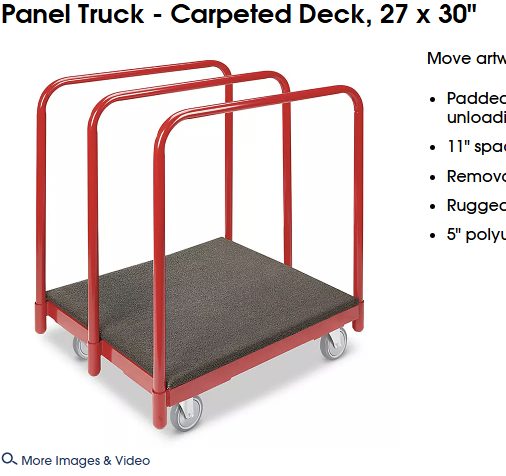 |
| Space Age Tote | Uline / S-133BL | 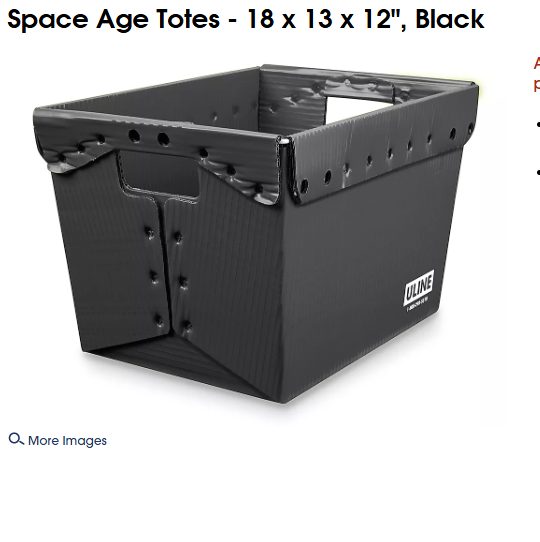 |
| Large Black Tote | Lowes / 44066 | 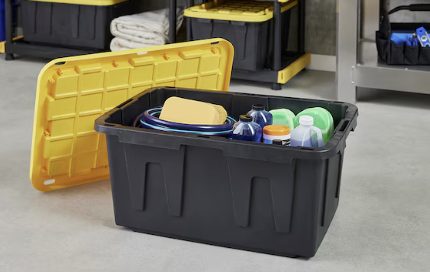 |
| High-Visibility Vest | 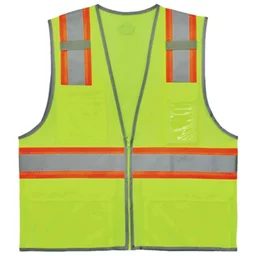 | Required by warehouse safety standards |
Procedures
Cargo
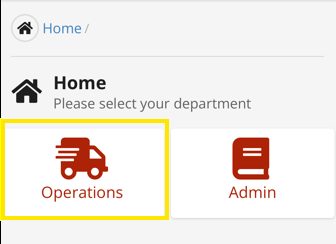
Once logged into Cargo, navigate to the Operations tools.
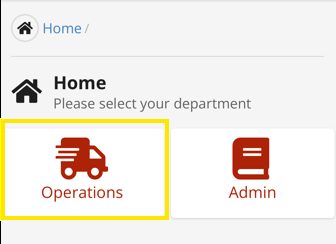
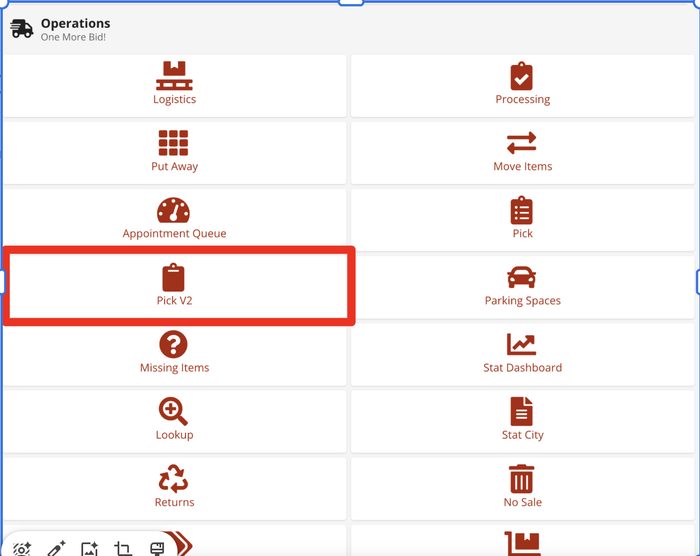
Pick Tool
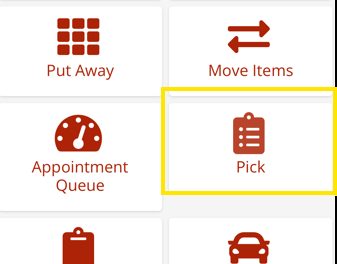
Then find and navigate to the Pick tool
Begin Order Pick
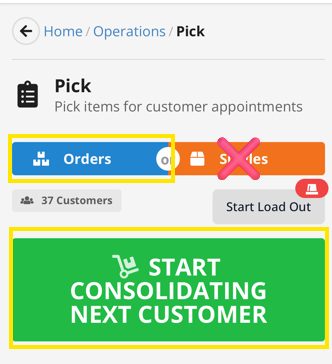
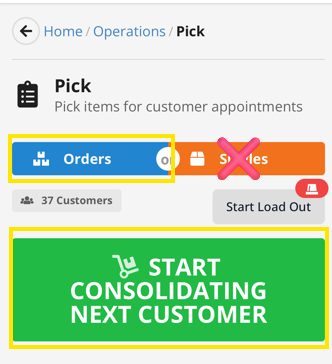
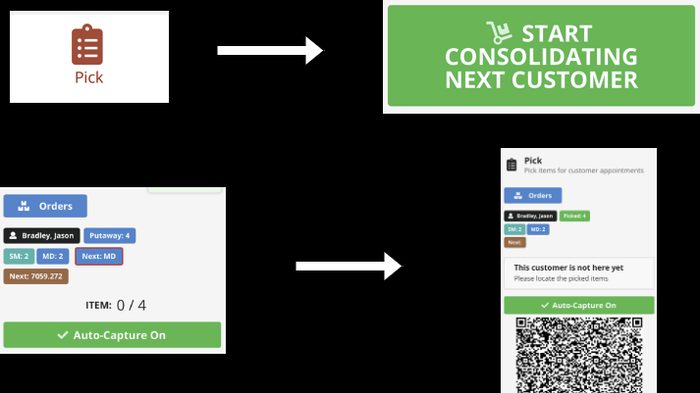
At the center of the screen, we have the option to choose which pick type we would like to fulfill. We will select “Orders”; “Singles” is covered in section B of this training. When ready, click the green icon “Start Consolidating Next Customer.”
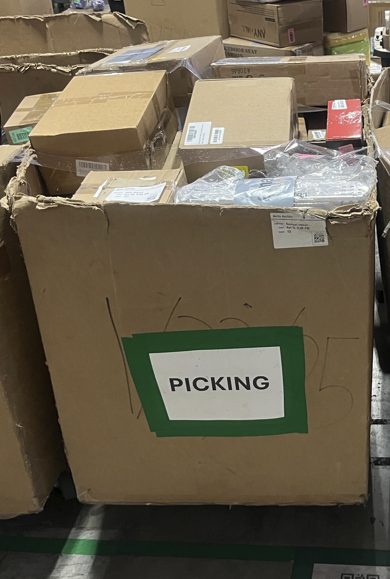
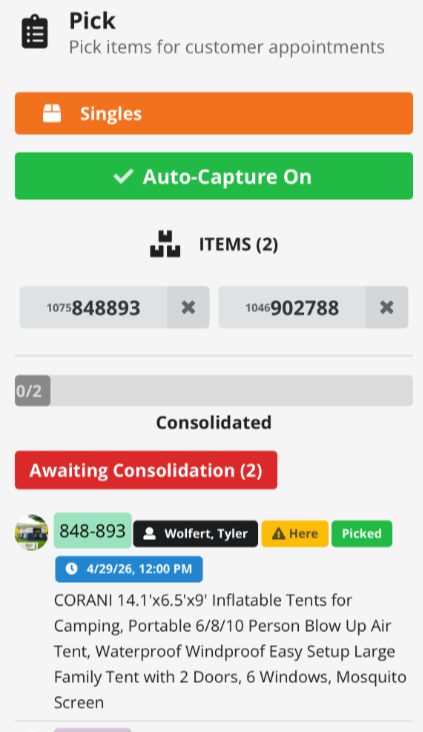
Pick Began/Order Pick UI
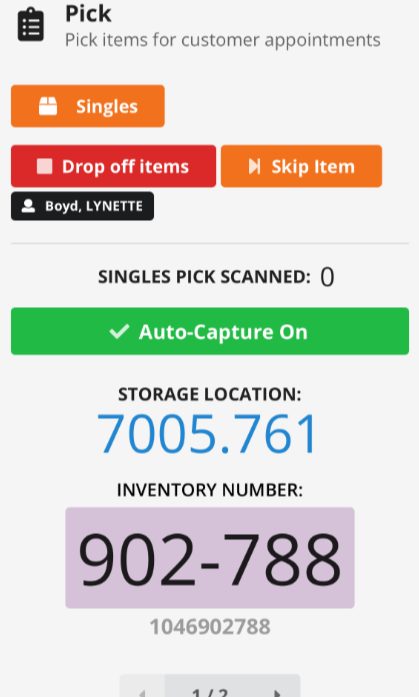
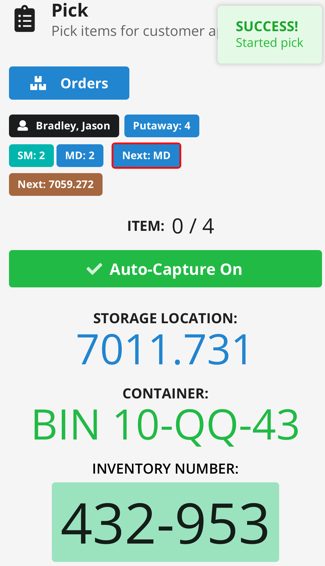
After starting the order pick, the top of the screen displays high-level information about the order: customer name (Last, First), total item count, item counts by size, the size of the current pick, and the location of the next pick.
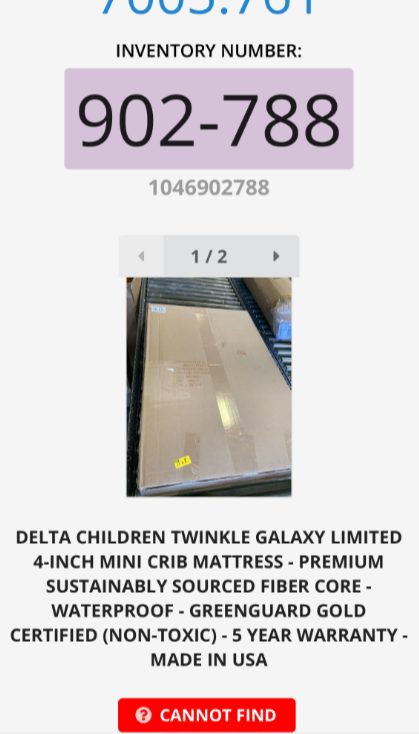
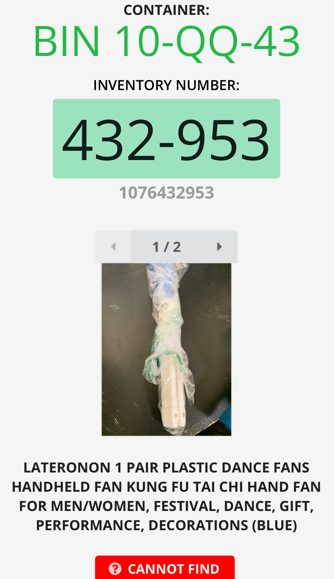
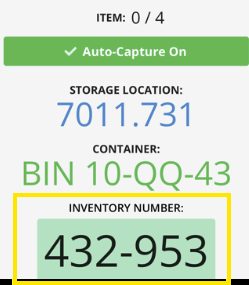
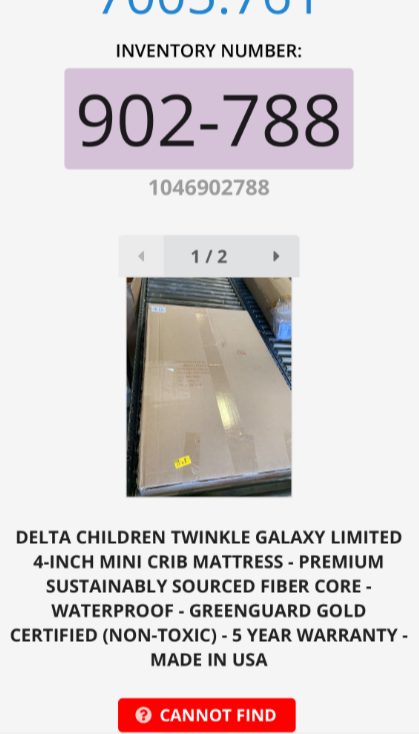
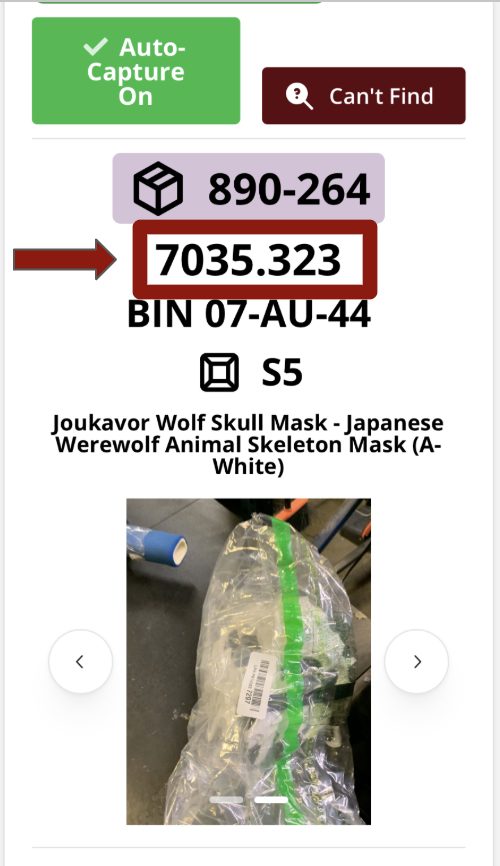
In the center of this screen we will see necessary information for the current item we are picking such as: the storage location of the items, the bin or receptacle the item is in if it is in a bin, the last 6 digits of the inventory number which we will use to find the item and verify that it belongs to the order, a description of the item, and a photo of the item which we will use to help us find the item.
At the bottom of the screen, there is a red icon labeled “Cannot Find” that shows item history and allow us to scan a manager override for a lost item.
⚠ PRO TIP
- Once you're comfortable with the Order Pick UI, using item count and item size information can help you decide which equipment is most appropriate for the pick and save you time and effort.
- The Next: icon can help you plan a more efficient route to your next pick
- Practice using clues in the photo and the description to find items faster. Try thinking about: is it in a bag or box, is it large or small, and what color is the item? I see a white, long, skinny item, a fan that is most likely small to medium size, in a bag, and I will consider that all while I travel to the storage location.
Recognize our storage methods
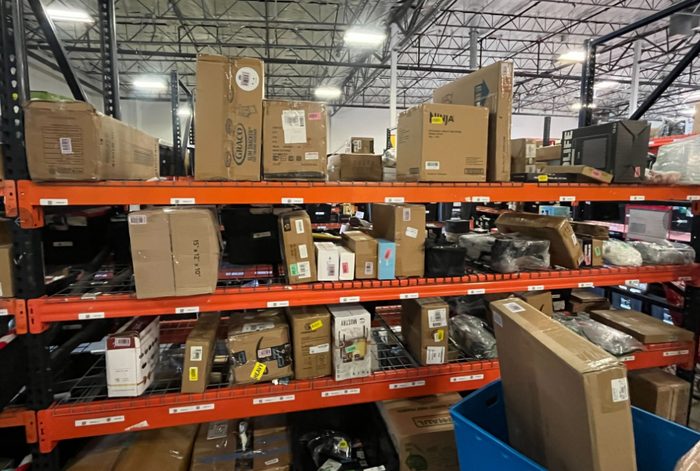
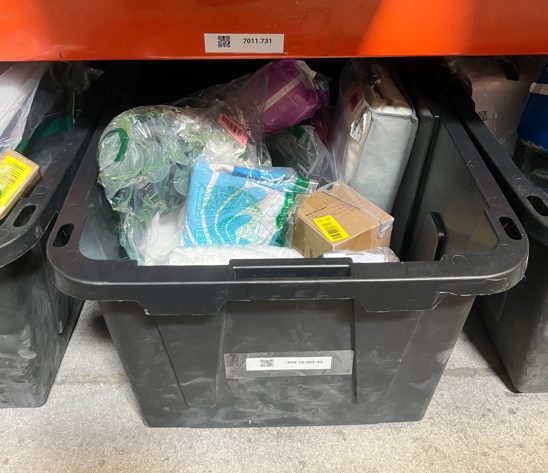
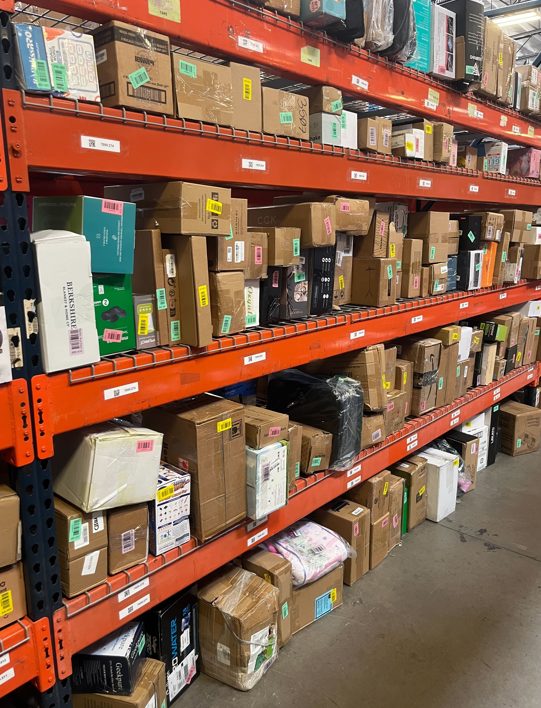
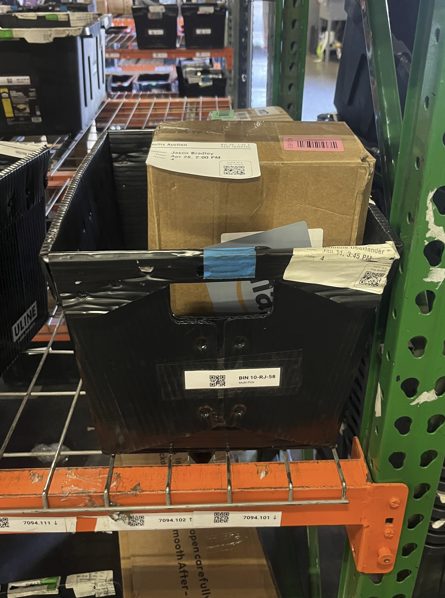
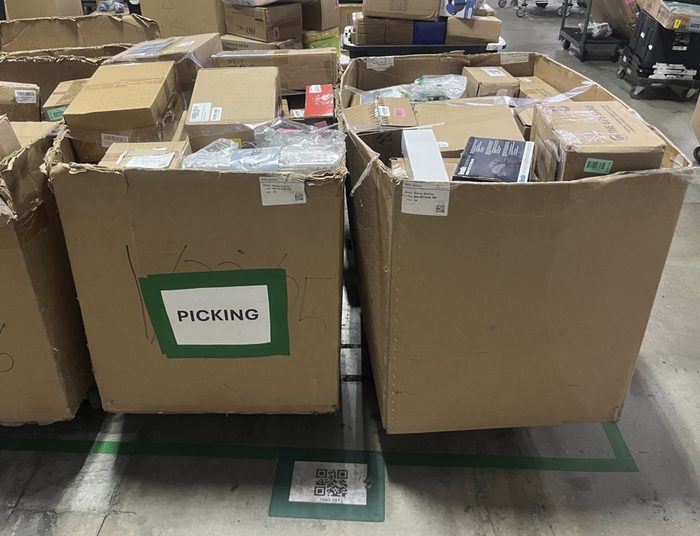
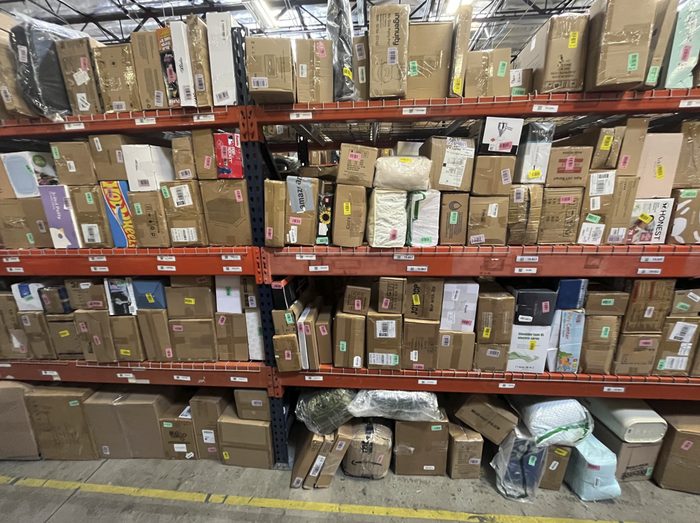
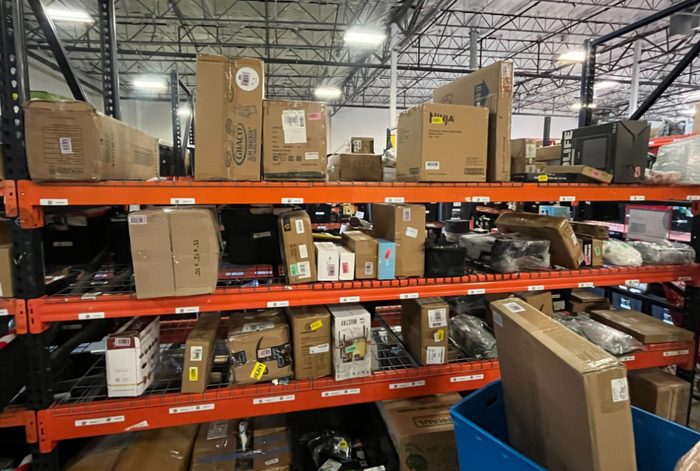
We store items in totes/bins or on shelves, depending on the item's size. We inventory products using varying sticker colors to make them easier to find on the shelf. Some common colors are: blue, green, pink, purple, yellow, and red. The sticker color of the item you are searching for is displayed on the screen, as shown in the example below.
Order Completion
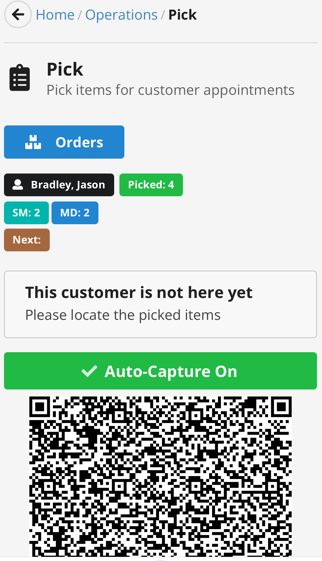
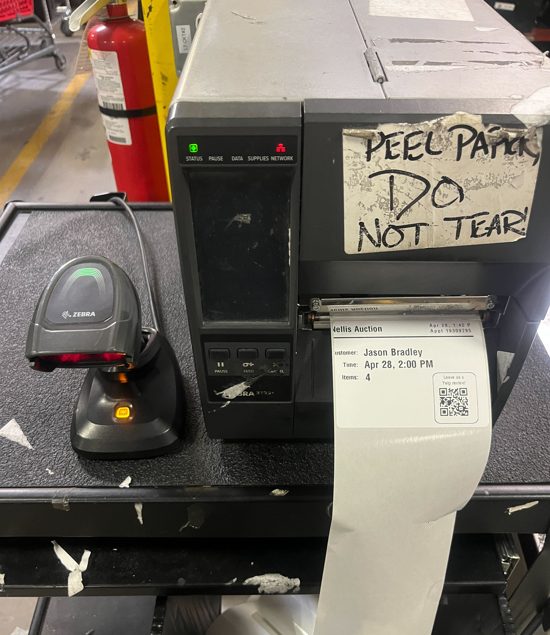
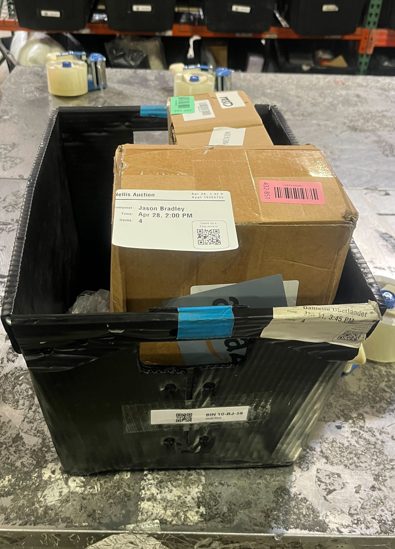
Once all items in an order have been picked, the system will prompt you to consolidate the order. A QR code will be displayed. Scan it at a print station to print the customer tag, which shows the customer’s name, appointment time, and item count. Every consolidated order must have a customer tag attached.When placing the tag, do not put it on equipment. Place it neatly on an item where it’s clearly visible, positioning it half on and half off the item (think 50:50) so it can be easily removed during loadout. See below.
⚠ PRO TIP
- Items at Nellis Auction come in all shapes and sizes, and the ways they can be consolidated vary. It is best to prepare them with your teammates in mind. Tape or stage items with barcodes facing out. Only store orders in receptacles that they fit neatly into and do not waste space. The photo above is a neatly stored order with the customer tag and barcodes facing out, ready for customer delivery!
After the order is tagged and prepared, find an appropriate consolidation location and scan the location barcode. There are two types of locations: shelf locations, which work best for small orders or orders in bins, and floor locations, which are used for large speed packs and carts. Do not store heavy orders on the top shelves. Once the order is placed, it is ready for customer pickup.
In the case that there is no space in the consolidation area or there is no suitable storage location, please see an Area Manager or your assigned Certified Trainer. They will walk you through the specific barrier and inform you on how to proceed in future instances. In the case that a picker is more experienced, they may make space by moving orders around or reorganizing them, but this requires the appropriate training to maintain order location accuracy.
While we strive for complete accuracy and integrity in every function, process variations can occur, and items may be missing from their assigned locations. When this happens, follow these instructions:
- If you cannot find an item in its location, check your scanner again, note its description, and use the photo to understand what it may look like.
- Consider packaging, item size, and color.
- If the item still cannot be found, begin a wider search.
- If the item is in a bin, perform a 9-bin search, which means checking every bin adjacent to the one you were sent to. See the photo below.
- If your item was on the shelf, start by searching the immediate area, especially the shelves above or below. The item may have fallen behind the items on the shelf.. Similar to the 9-bin search, check the seven locations to the left and right of the assigned location.
- The above instructions constitute the “expected search area” for trouble items. This search should take about 2 minutes. If you cannot find the item after that, find a manager or submit a help request via Nelli Scan.
- When the manager arrives, you will assist them in searching a wider area. Please do not stand idle while the manager searches; we should assist them in the search.
- If the item is not found, it will be marked as lost, and any accrued gap time will be corrected via a Labor IQ assignment.
With a wide range of order sizes and item sizes, we have a handful of picking carts and receptacles that could suit our picking needs. Take a moment to review each option and when it is best used. Also, when we pick with a certain tool and, at the end, it does not fit the order, we should consider moving the order off that cart or receptacle and into a more appropriate tool for consolidation to conserve our picking tools.
Small bins are great for small orders or loose items that need to be neatly contained. These should be placed on a shelf.
- Large bins are great for smaller orders with larger items or for medium-sized orders that fit neatly in this container. These should be placed on a shelf.
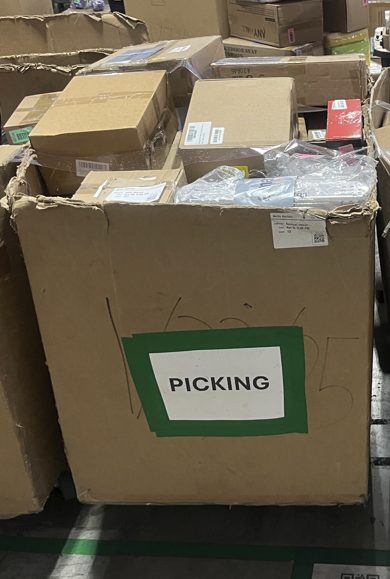
- Speed packs are great for a collection of large/medium-sized items or a very large order of small or medium items. It is important that we use most of the speed pack to make the most of this tool, and we want to avoid overfilling it and damaging the equipment.
- Dollies are best used when an item, or a few items, are large and can be stacked neatly and securely onto them. They can also be used to roll a black bin if it is too heavy to carry.
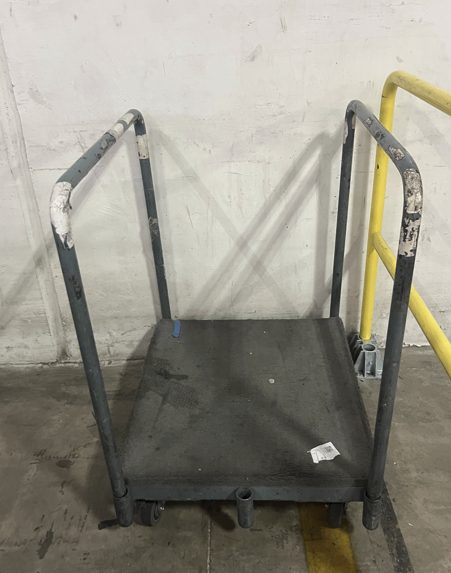
- A panel cart is best for large or long items that will not stand on their own. Mirrors, bed frames, and mattresses are great examples. When an item is too large for a speed pack, a panel cart might be the best option. Keep in mind that the bars can be moved to help support items.
Safety Consideration: Do not stack small, large bins or dollies higher than four (4) feet.
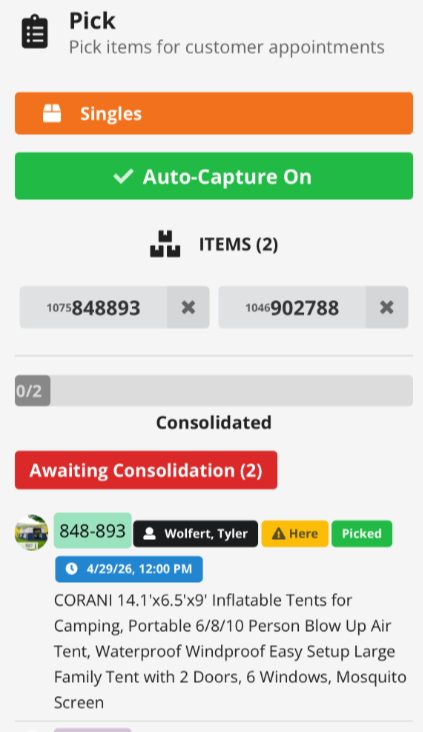
To access the Single Pick function, navigate to the pick screen as in the Order Pick instruction above. Then select the orange icon “Singles.” When working in the Single Pick app, we will pick orders until we fill our carts. In the start screen, we have the option to "Start from the front” to restart the pick at the front of the pick path, or continue where we left off at “Start from xxxx.xxx.” Knowing this can help you dictate your pick path.
⚠ PRO TIP
- This screen also displays the number of single-pick-eligible items. Be sure to connect with your Area Manager or Certified Trainer to understand what the goal is for picking a single item order in the Single Pick app. It might be the case that you only want to pick singles when there are enough single picks to justify the goal. Check with your Area Manager or Certified Trainer for your facility's single-pick goal.
Pick Began / Single Pick UI
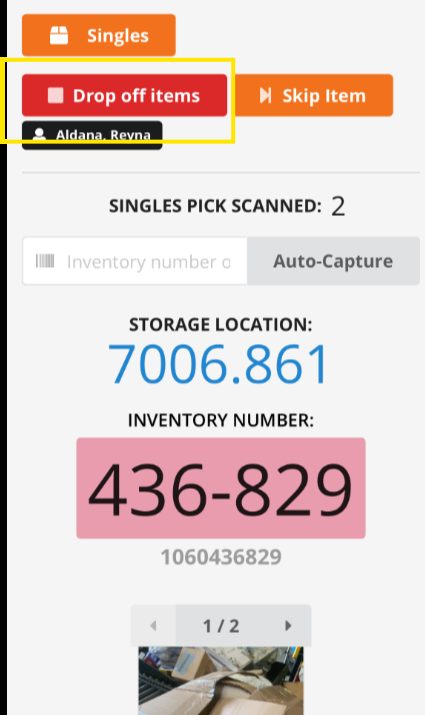
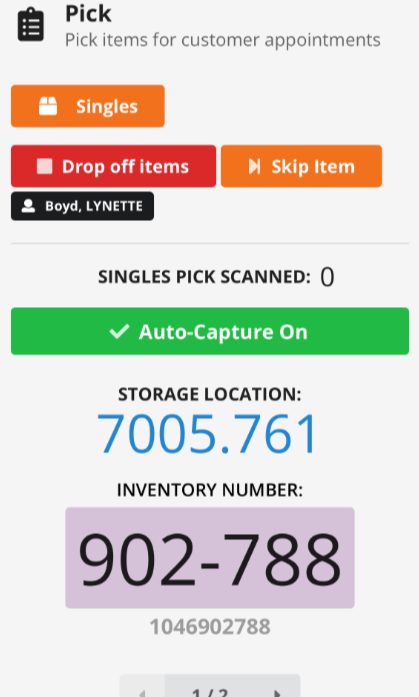
The next screen is where we will pick items and navigate through the queue of single picks. Much like the Order Pick UI, this screen displays all customer and item information. This screen also provides unique navigation tools for single picking.
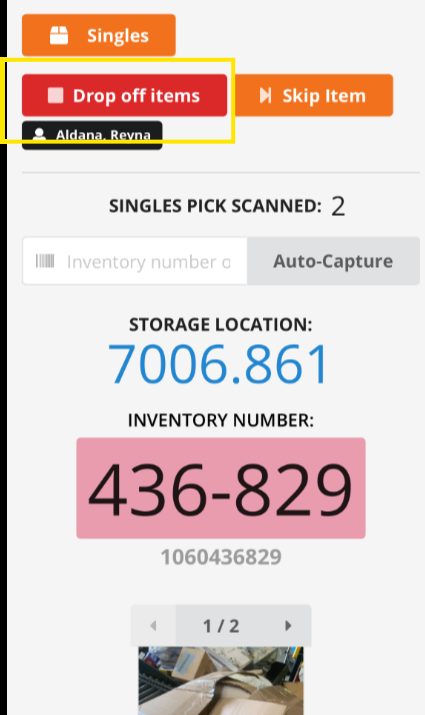
We will use the “Drop off items” button once our cart is full and we are ready to consolidate the single-item orders. In single picking, we do not pick until it is finished; we pick until our cart is full.
The “Skip Item” icon will let you skip an item and move on to the next. The intended purpose of the single pick app is to pick all available single-item appointments as efficiently as possible. If an item is oversized or unsuitable to pick given the circumstances, we will skip it and be prepared to return on our next revolution. The skip item allows us to do so.
Single Pick Process
The Single Pick app and process will continue much like the Order Pick process. The Single Picker, however, will pick single-item orders until their cart is full, then hit the “Drop off items” icon. Depending on the starting position in the pick path, you will want to pick an appropriate cart. Since we are picking until our cart is full, we want a high-capacity cart, such as a Speed Pack for small items or a Panel Cart for XL/Large items. This will be determined by your warehouse layout and pick zone. Please get with your Certified Trainer to be introduced to your warehouse's unique layout and to learn which aisles are designated for which item sizes.
The Single Pick Consolidation process differs from the Order Pick.
- Single items do not require customer name tags, and the single pick app will not provide a QR code. The inventory number being verified by the Loadout employee is sufficient.
- Single items are consolidated in a designated area to organize the space and make them easier to find.
- In this single-item designated area, bins are used to consolidate small single items that may not be appropriate for a shelf. See below.
To complete the consolidation process, scan the barcode of each item, place it in the designated single area at a location suitable for its size, then scan the location barcode to locate it. The app expects all picked items to be scanned, so if any items are missing or a barcode is missed, you will need to troubleshoot the error or the missing item. After all of the items are consolidated, the app will return to the start screen, ready for another revolution if applicable.
Cargo
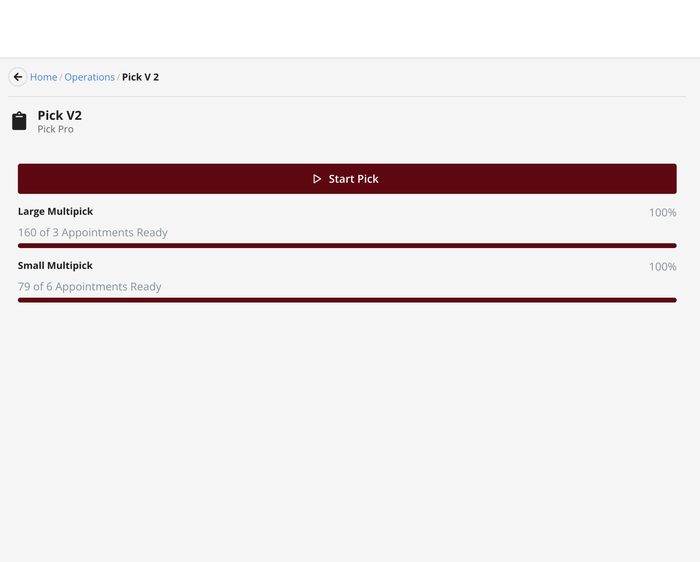
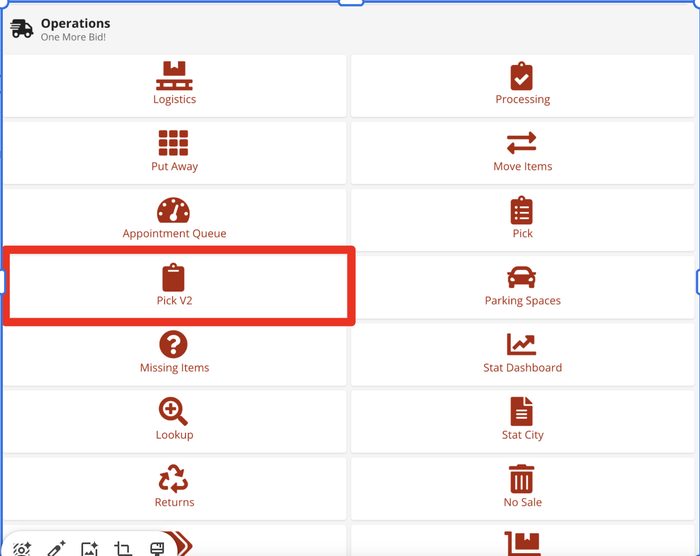
Using the Handheld RF Scanner, log in to Cargo and select the Pick V2 tool.
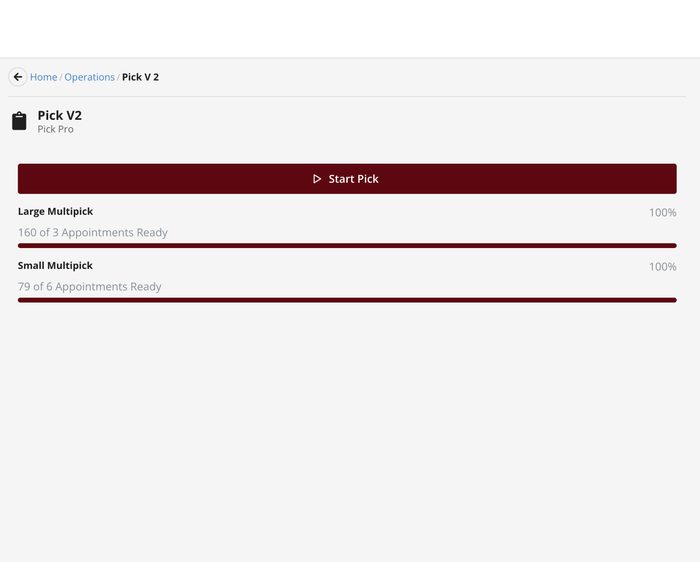
On the starting screen, you will see a Start Pick button and two bars displaying the counts of orders currently identified as Small and Large.
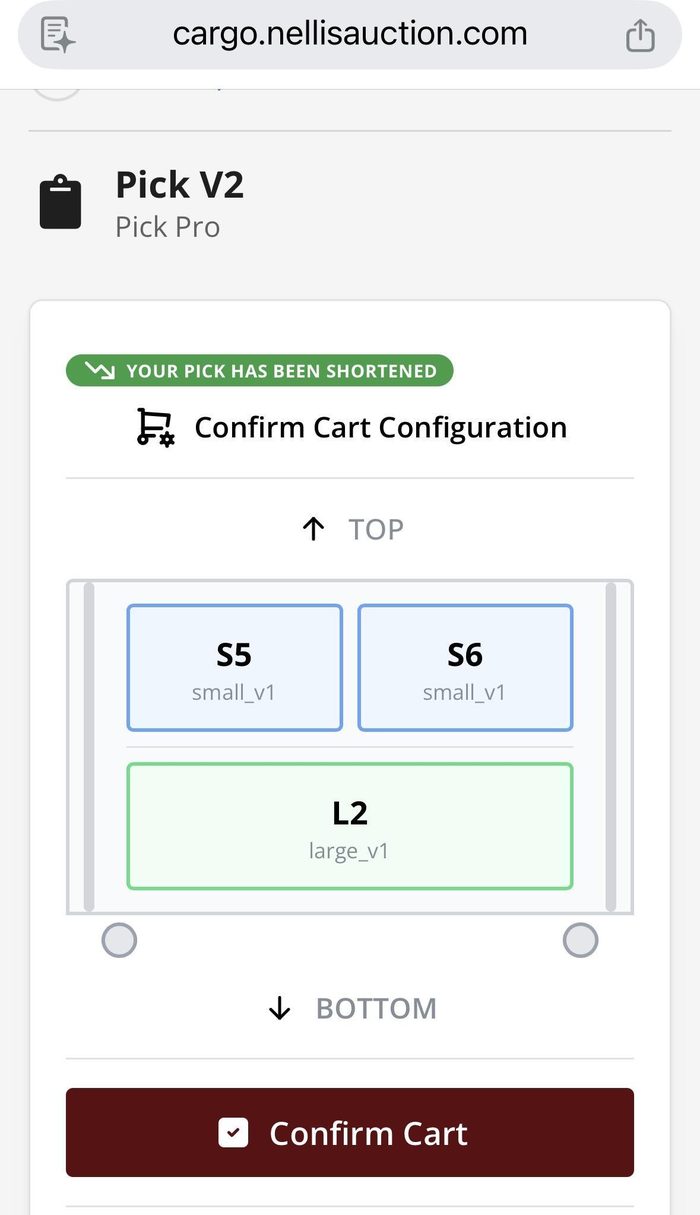
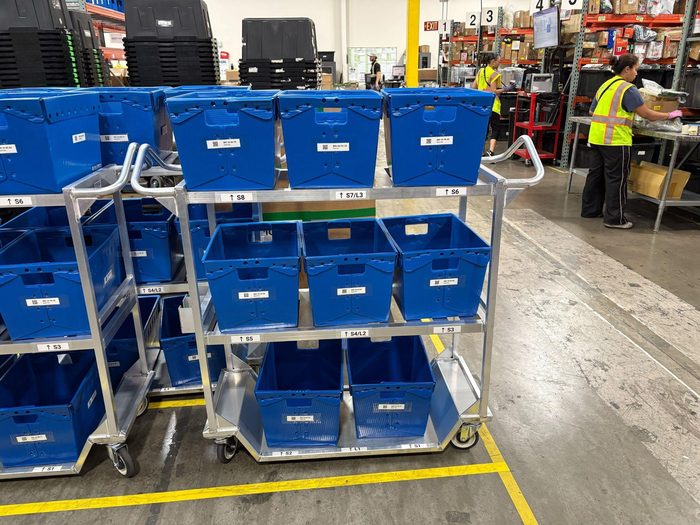
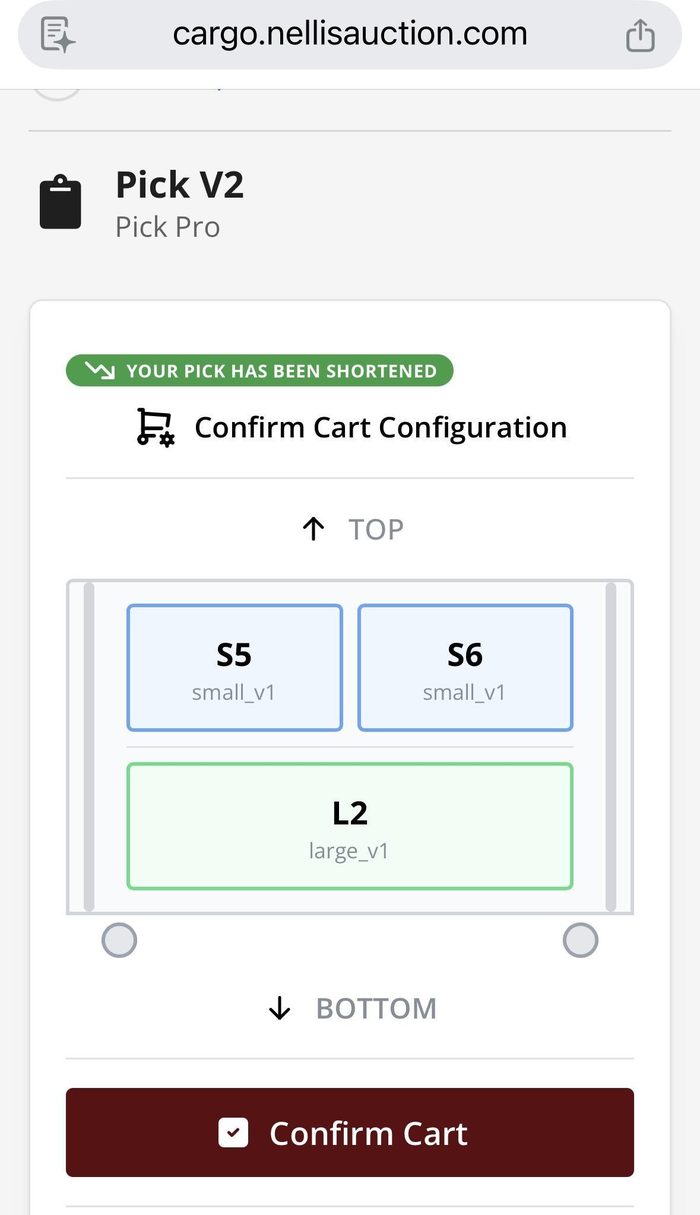
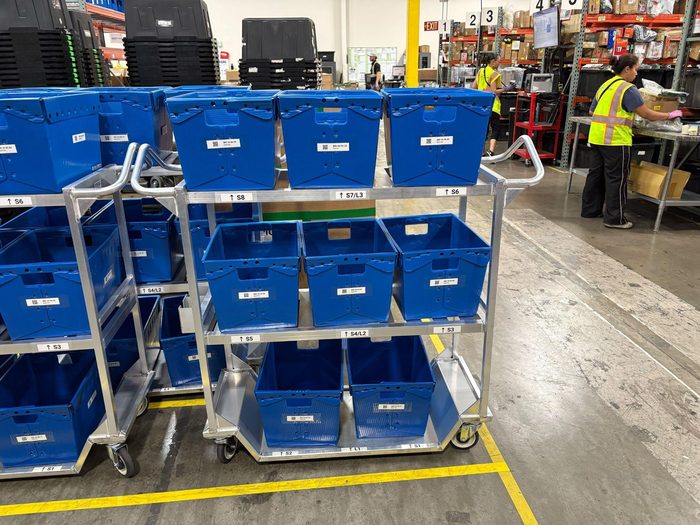
After pressing Start Pick, you will be directed to confirm the cart you will use to complete your pick revolution. S indicates the need for a small tote, while L indicates the need for a large tote. Carts can hold up to 8 small totes or 3 large totes, as well as various combinations of the two sizes. Follow the picture on your screen to grab or build your cart.
Carts can be retrieved from the designated equipment staging area in your building. Carts may either be pre-built by a Multi Pick Consolidator ahead of time for you to quickly grab and go, or there will be empty totes and carts available for you to build your own cart
Navigate to the first picking location displayed on your screen.
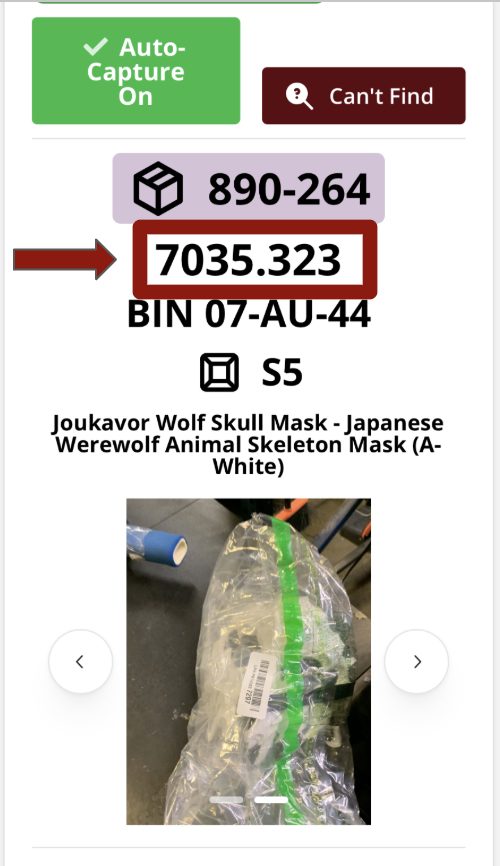
When you arrive at a pick location, your screen will display the following information to help you locate the correct item:
- The last 6 digits of the pick’s inventory number and the sticker’s color.
- The rack location where the item is stored.
- When applicable, the specific bin within the storage location where the item is housed.
- The slot on your cart the item belongs to (S1–S6 for Small, L1–L3 for Large).
- The lead description of the item.
- One or more photos of the item to help with visual identification.
Using the storage location information displayed on your screen, navigate to the indicated storage location.
Once there, use the item's inventory number, lead description, and photos to visually identify the correct item.
Cross-reference the last 6 digits of the inventory number on the item's sticker with what is displayed on your screen to confirm you have the correct item before scanning.
Once you scan the inventory number and are ready to place the item in its tote, your screen will update to show:
- Displays the destination tote slot (e.g., L1, S3). Once a tote has been assigned, this updates to display the tote name (e.g., BIN 10-AB-1234).
- Displays the slot on your cart where the destination tote is located (L1–L3 or S1–S6)
- Displays the location of your next pick to help you begin navigating while the system loads.
Place the item into the designated slot/tote, then scan the tote’s barcode to confirm the pick.
At all times, the bottom of your screen displays a progress panel showing all orders currently on your cart.
Each order is represented as a row with a column chart indicating pick progress. You can tap on any slot (S1–S8 or L1–L3) to expand it and view the individual items in that order, along with the pick status of each.
Continue this process for all picks across all orders in your cart.
To track your progress, refer to the Total Items circle.
Once all items in your cart have been picked, you will be instructed to consolidate your cart.
Proceed to Procedure 2: Consolidating Your Cart (Individual Consolidation) and Procedure 3: Consolidating Your Cart (Select All).
After scanning the tote’s barcode, the order will be highlighted in red.
Identify an available rack location AS CLOSE TO THE LOADOUT DOOR AS POSSIBLE. Scan the location barcode.
After consolidation, the order will turn green.
Once steps two through four have been completed for all orders, the task will finish, and the Multi Picker will be prompted to begin the next picking assignment.
Once all items in your cart have been picked, you will be instructed to consolidate your cart.
Note: Only use the Select All method when a Multi Pick Consolidator is actively working the dropoff lane.
Press the Select All Bins button.
Place the Multi Pick cart in the designated cart dropoff location and scan the location barcode.
The Multi Picker has completed the tasks of that cart and will then be prompted to enter their next pick.
Process Flow Diagram
Visual overview of the end-to-end process flow.
The Nellis Standard
Key observable, auditable behaviors and outcomes that define excellence in this process.
The following standards are extracted from this SOP and represent the key observable, auditable behaviors and outcomes that define excellence in this process. These standards feed into the Nellis Auction master audit framework.
Nellis Auction Pickers fulfill every customer order with efficiency, accuracy, and safety. We stay active and disciplined, treating every item as if it were our own—handling it with care and accounting for it precisely, so every customer gets exactly what they won.
Preparedness - The amount of buffer time between current time stamp and the appointment times currently being picked. Generally, our goal is to be picked 1 hour in advance of all appointments (exception: short notice appointments). Missing Item % — The % of total items picked in a day that are missing. The goal is <= 0.35%. While this metric is listed for Picking, it is reflective of both Putaway & Picking. PPH – Points per hour. The number of points an individual employee earns in one hour for the collective direct actions they perform (i.e. loading out). Goal: > = 100pph Gap Time – The amount of time, measured in minutes, but typically reported as a % of total time where an employee was not in an active state performing direct work. Although there are acceptable levels of gap time expected for all employees, the goal is generally to minimize this as much as possible. Goal: < = 10% (example: 10% x 570 mins = ~ 57 mins). Observational Metrics: Employee Active State – Employees are actively finding value-add work to do during slower periods, namely load-out, organizing, and cleaning when necessary. Employees are never observed congregating in an unproductive state (exception: brief water break). Rack Etiquette & Housekeeping - Storage racks, pick aisles and the consolidation area are organized according to the Nellis Auction Rack Management Policy; free of clutter, debris, rogue inventory, and unnecessary equipment (#OperationPolish).
Pickers consistently and repeatedly complete picking and consolidation actions for one pick and then immediately accept their next pick with minimal downtime and remain in an active working state throughout the day.
Pickers verify that they are in the correct location (and/or BIN) before searching for the item to minimize costly downtime for being in the wrong place.
Pickers leave the rack location in good order after picking their item, setting the next user up for success.
When items are initially assumed missing, Pickers conduct a quick, but thorough search for the item leveraging the Missing Items Research feature within Cargo. Once escalated to a Manager, the Picker continues to assist with searching until the Manager determines the item is in fact missing.
Pickers handle all items with care and will avoid tossing, throwing, or slamming items. All items should be neatly organized in bins or carts to the extent possible.
Pickers consolidate items in a consistent manner by placing orders in appropriate receptacles or taping them neatly, labeling all order/appointment picks with a customer tag that is partially placed half on the customer product (not the cart or bin), and the order is staged in an appropriate location with barcodes and customer tags facing outwards for easy identification.
Pickers maintain a safe but steady & workmanlike pace while picking and maintain awareness of their surroundings at all times.
Pickers consistently practice the following safe work behaviors: Proper lifting technique; request a team lift for items weighing more than 50lbs Proper cart handling; never ride or “coast” on carts Proper rack engagement; never climb on racks or into storage bays Proper ladder use; Picker faces forward when using ladders and maintains 3 points of contact whenever possible. Proper inventory handling; 1 hand for smalls, 2 hands for larger, heavier product
Orders are placed as close to the loadout door as possible in the appropriate rack elevation.
The picker uses appropriately sized equipment for the order before beginning the pick.
Common Exceptions
| Exception / Scenario | Resolution | Reference Document |
|---|---|---|
| Missing Items | Perform the expected search for each storage type Request manager assistance after completing the expected search | [Link or doc name] |
| Missing Barcode | If an item is missing a barcode, but you are sure you have found the item, complete the pick by holding down the item number until the device allows you to copy the item number. Paste it into the enter field. When you have completed the pick, take the order or item to your Area Manager, and they will replace the label. | |
| Cart capacity exceeded | On occasion, you may fill your cart before the pick is completed. In the case of order picking, you can consider whether you will: find a more suitable cart to complete the order, then transfer all of your picked items into your new pick cart. Or if you will need another cart, you will take your full cart to the consolidation area and stage it in a location, finish your pick, then group the carts together and place a customer tag on each cart, and place tape around the carts. For the first few instances, check with an Area Manager to ensure this is completed correctly. | |
| No available Consolidation locations | In the case that there is no space in the consolidation area or there is no suitable storage location, please see an Area Manager or your assigned Certified Trainer. They will walk you through the specific barrier and inform you on how to proceed in future instances. |
Supporting Job Aids & Forms
| Document Name | Description | Link / Location |
|---|---|---|
| [Document Name] | [Brief description of the document] | [URL or file path] |
Training & Certification
| Training Requirement | Audience | Frequency | Delivered By |
|---|---|---|---|
| [Initial Onboarding Training] | [New Hires] | [Day 1] | [Certified Trainer] |
| [Recertification / Refresher] | [All Team Members] | [Quarterly] | [Area Manager] |
Quality Control & Auditing
| Audit Type | Frequency | Performed By | Documentation |
|---|---|---|---|
| [Spot Check] | [Daily] | [Area Manager] | [Audit Log / Form] |
| [Formal Audit] | [Monthly] | [Ops Manager] | [Audit Report Template] |
All deviations from this SOP will be addressed using a progressive accountability process.
Safety & Compliance
PPE:
- Cut-resistant, screen-friendly, work gloves
- Close-toed, comfortable shoes
- Optional: back brace
Procedures and practices:
- Practice proper lifting techniques per company guidelines
- Participate in morning stretches
- Do not climb on racking shelves or bins
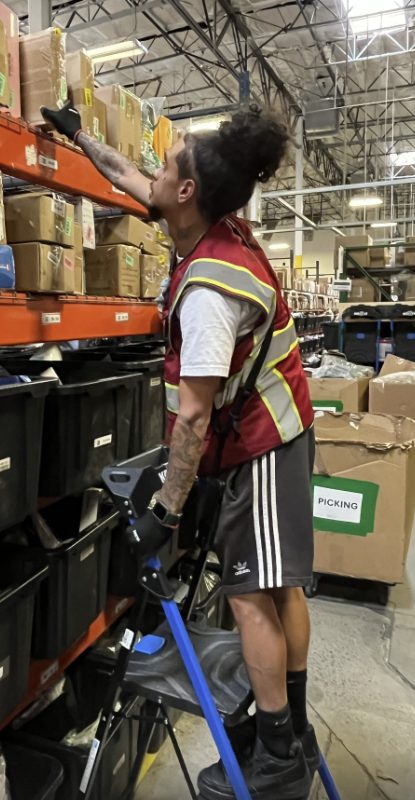
- Use ladders while facing the right direction, ensure the ladder is facing the item and not askew, and maintain 3-points of contact (see photo below)
- Practice team lift when items weigh more than 50lbs
- Do not climb into storage bays
- Do not ride carts
All safety incidents, near-misses, and hazardous conditions must be reported immediately to ensure a safe work environment and proper documentation.
What to Report:
- Work-related injuries and illnesses
- Near-misses (events that could have caused injury or damage)
- Unsafe conditions (equipment issues, hazards, weather-related risks)
- Vehicle-related incidents in the parking lot
Reporting Process:
- Notify a Manager Immediately
- Report the incident to the Area Manager or supervisor as soon as it occurs.
- Do not delay reporting, even for minor incidents.
- Ensure Safety First
- Stop work if necessary.
- Move to a safe location.
- Assist any injured individual if it is safe to do so.
- Seek Medical Attention (if needed)
- For injuries, request first aid or medical assistance by contacting the Nurse Hotline.
- Call emergency services (911) for serious situations.
- Document the Incident
- Complete The Safety Hub report form with accurate details.
- Include time, location, individuals involved, and a detailed description of what occurred.
- Manager Documentation & Escalation
- The Manager will log the incident according to company policy.
- Injuries/Illnesses: Management to complete Slack notification for awareness. If the incident results in a medical visit, complete the Injury and Illness Incident Report (IIIR).
- Escalate to upper management, EHS or HR, if required.
- Follow-Up
- Follow all corrective actions or safety recommendations provided.
- Utilize the Incident Investigation Form to conduct a thorough investigation if requested.